How is a shared mailbox different from a regular mailbox?
A Shared Mailbox is extremely useful for users who want to collaborate. Consider a company with five graphic designers working on a common project and communicating with a regular mailbox address. Having a separate email address and password makes it difficult for them to store documents and respond to customer emails. It may generate duplicate copies of emails, or they may reply to the same client twice. A team member can easily miss important information that is communicated to another member.
A shared mailbox comes in handy in this situation. Here are a few advantages of the shared mailbox over regular mailboxes.
- A shared mailbox has a common email address (such as design_team@example.com) but does not have a password of its own.
- Except in a few cases, it also does not require an Office 365 license.
- All members of the shared mailbox can send and reply to emails as if it were a single mailbox.
- Any calendars or files stored in the shared mailbox can be accessed by all the members.
- The email address can be shared with other members in a team, and if a customer replies to an email, any member of the shared mailbox can conveniently reply back.
Members of a shared mailbox can be added from the Office 365 admin center. Many of you might wonder if it is possible to add an email signature to messages sent from a shared mailbox? Yes, indeed! Let’s take a look at the various methods for adding Office 365 signatures to shared mailboxes in this article.
Steps to set up signature for shared mailbox in Exchange online
The following steps describe how to set up email signatures for your shared mailbox from the Exchange admin center (EAC)
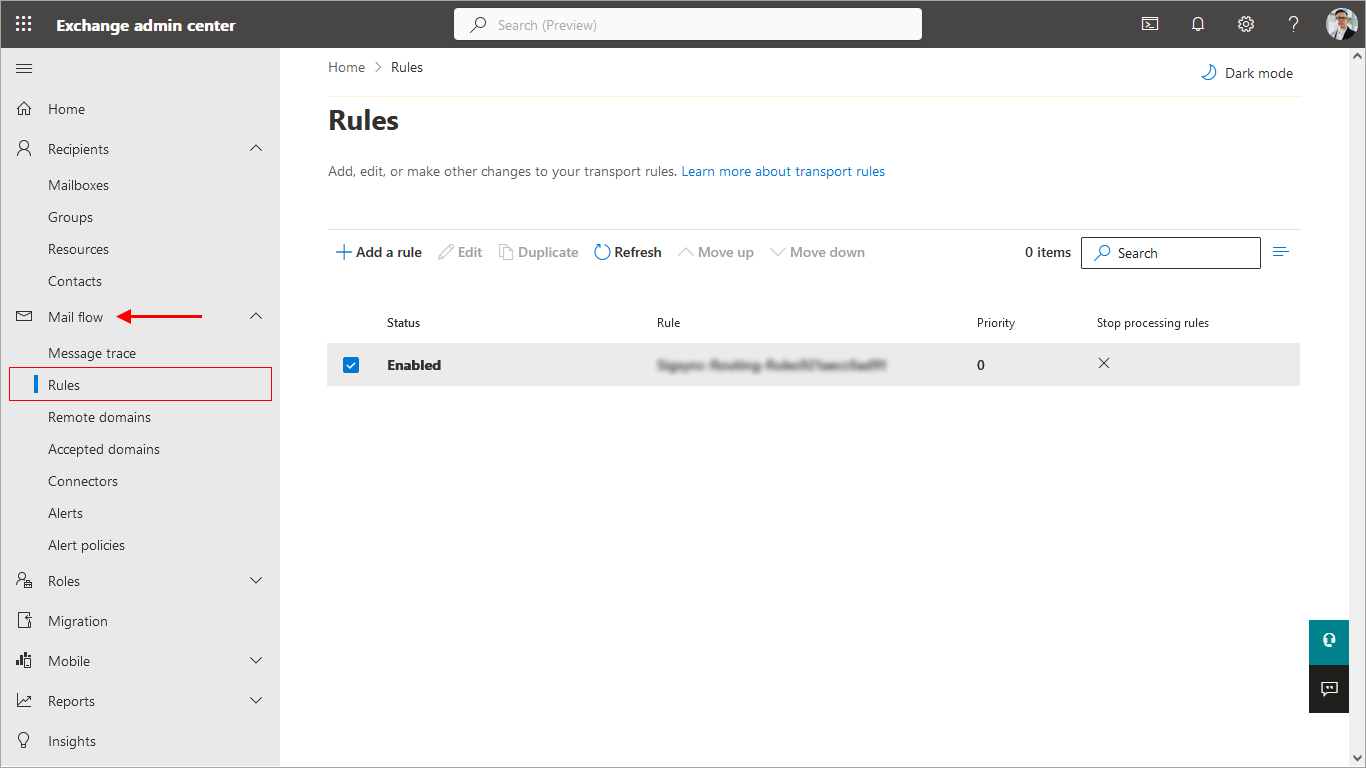
Step 1: Go to the Mail flow rules in the EAC
- Log in to the Exchange Admin Center, and then under Mail flow, click Rules.
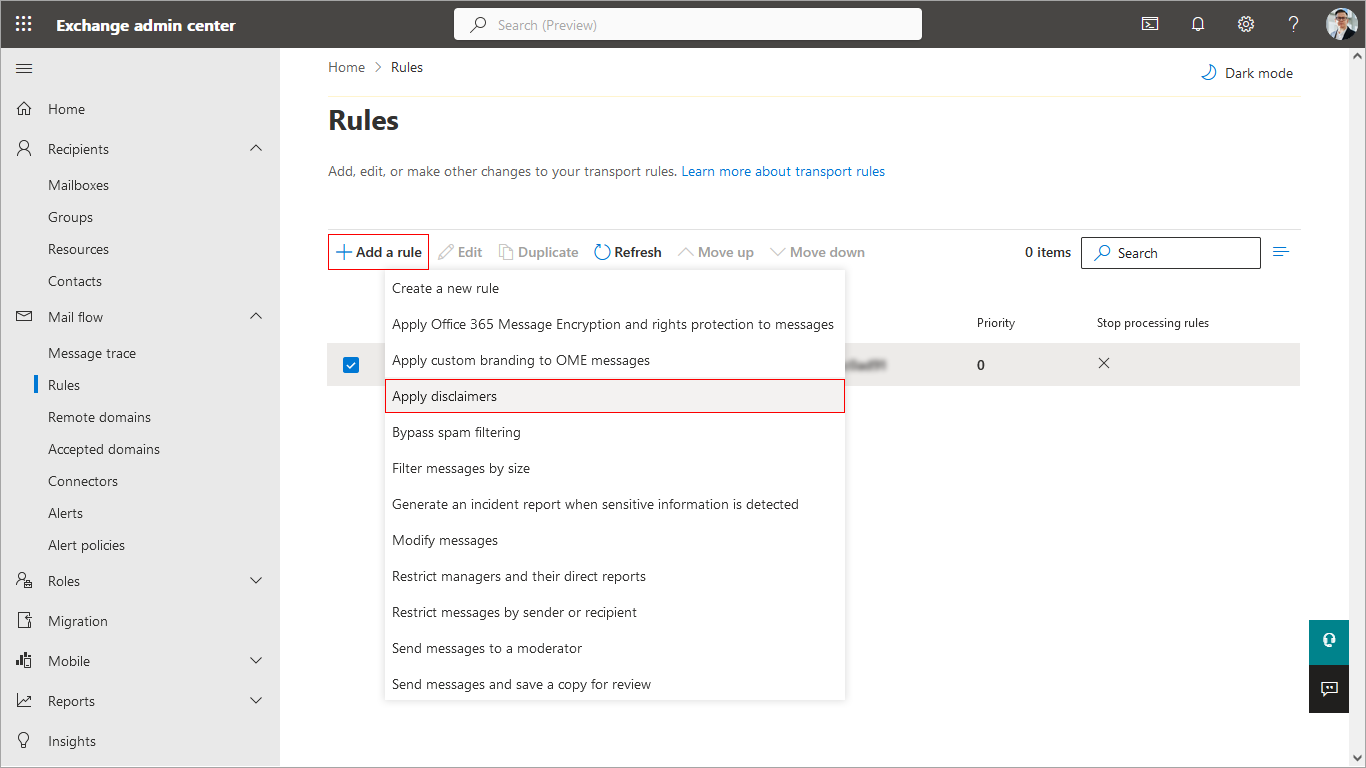
Step 2: Create a disclaimer rule for your signature
- Click the + icon, then choose ‘Apply disclaimers’. Enter a suitable name for the rule such as “Signature for shared mailbox Office 365”
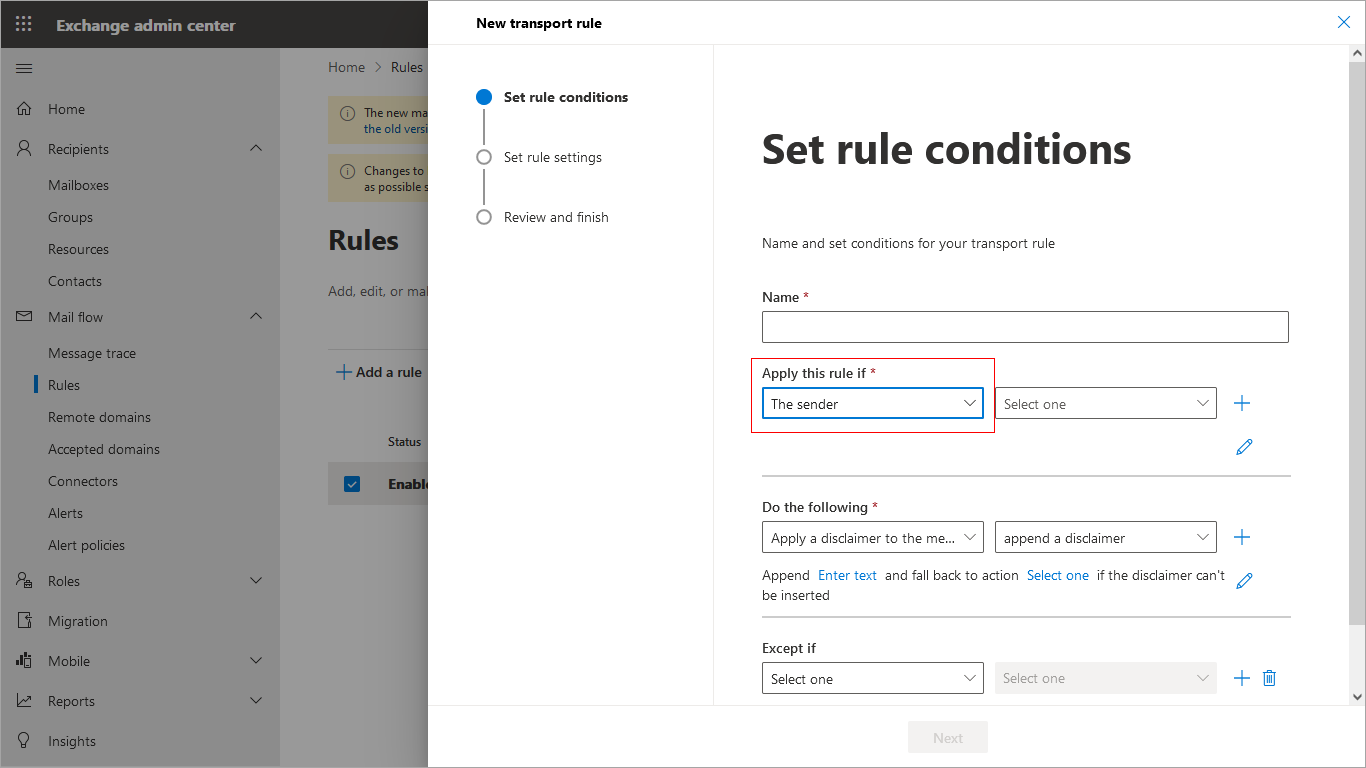
Step 3: Apply the disclaimer rule to the shared mailbox address
- Under ‘Apply this rule if..’ select ‘The sender is’ and choose your shared mailbox from the list. Click OK.
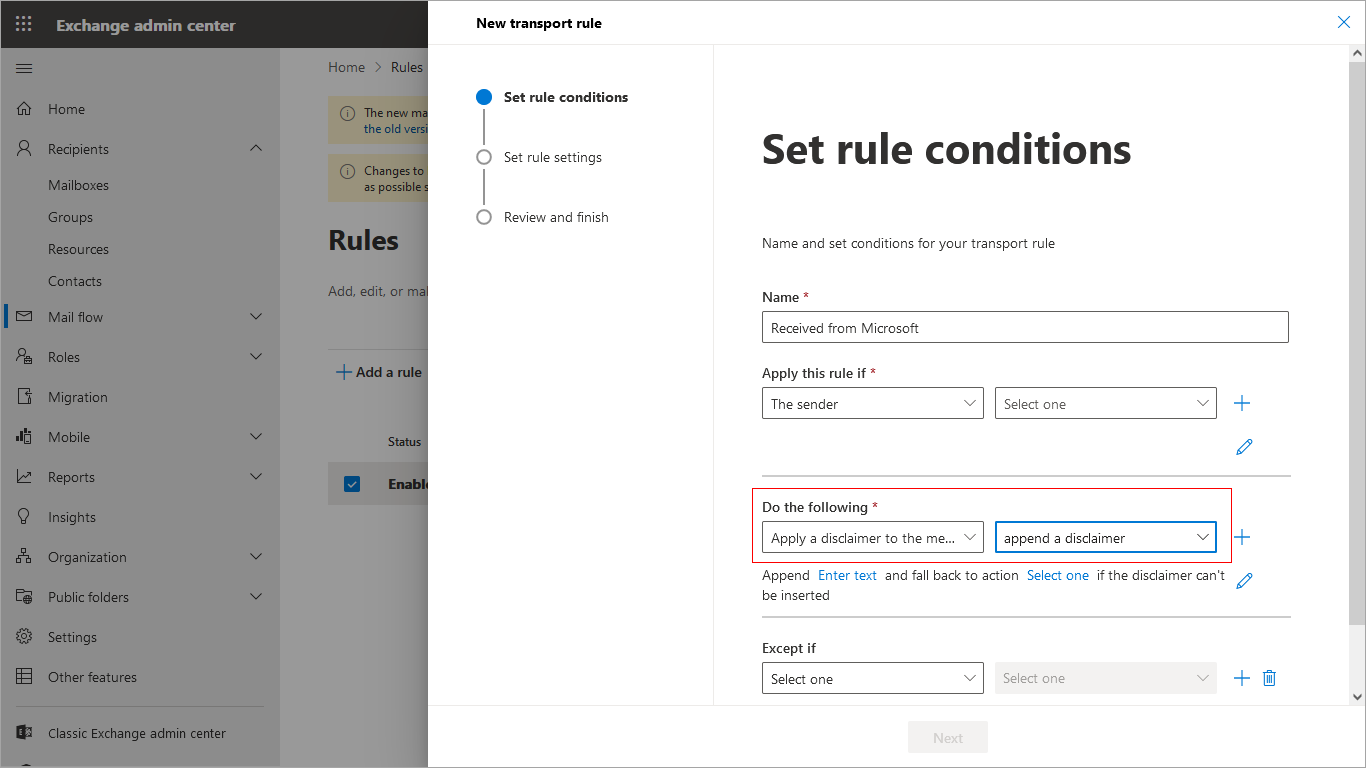
Step 4: Create and add an HTML signature to the disclaimer rule
- Under ‘Do the following… section’, select the ‘Append the disclaimer..’ option. Click ‘Enter text’ and add an HTML signature code and disclaimer of your choice in the text box.
Step 5: Choose a fallback option and save the disclaimer rule
- Click ‘Select one’ and choose a suitable fallback option in case the signature cannot be inserted.
- Configure other types of rules such as exceptions to remove the signatures on replies or if the email contains specific words.
- Click ‘Save’ to save the disclaimer rule
What are the pros and cons of this method?
Pros
- The rules are automatically added on the server side.
- The rules are helpful when you want to specifically exclude the signatures depending on the keywords, senders etc.
Cons
- Centralized signature management is not possible.
- You have to manually create and add the HTML code in the disclaimer field if you want to send professional email signatures.
- Disclaimers added in the text box do not appear in the sent items folder. It’s also not possible to preview the disclaimer text while composing an email.
- When you reply to an email, the signature is always added at the end of the email thread and not directly beneath the reply message.
Steps to set up Office 365 shared mailbox signature in Outlook
The following steps describe how to set up email signatures for a shared mailbox in Outlook 2019, 2016 and 2010.
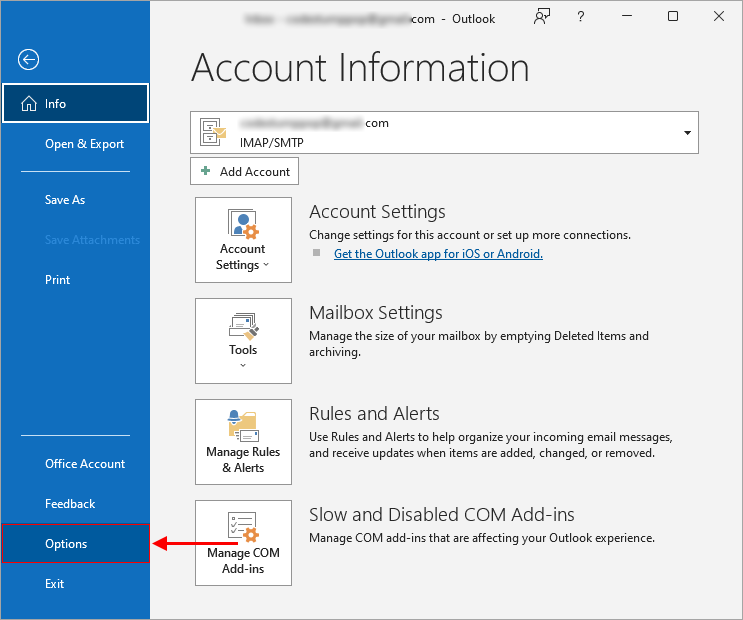
Step 1: Open Microsoft Outlook and go to Outlook options
- Open Microsoft Outlook on your computer
- Click ‘File’ > ‘Options’
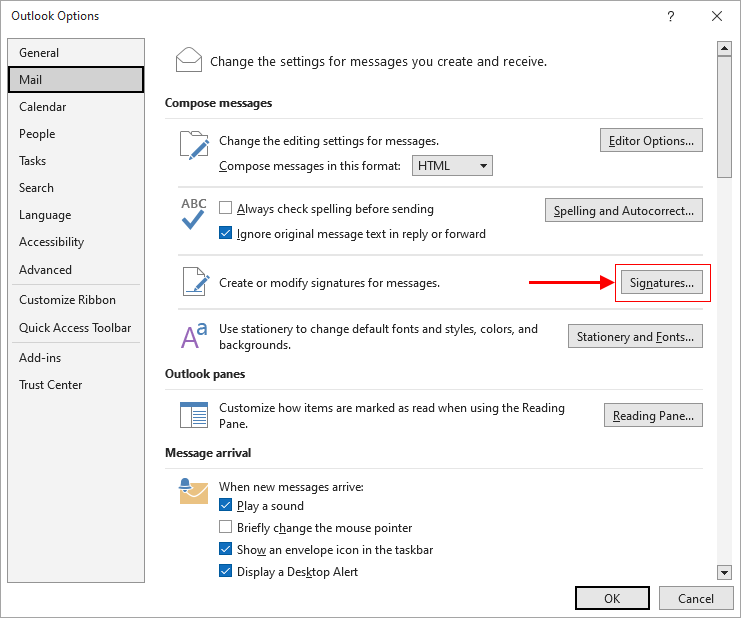
Step 2: In the mail and compose message settings, select Signatures
- Select the Mail option in the left pane and click ‘Signatures’ as shown.
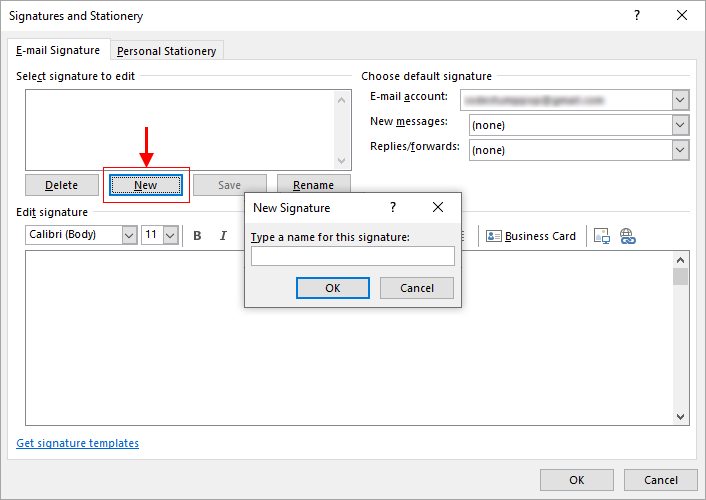
Step 3: Create a suitable signature and assign it to the shared mailbox
- In the ‘Signatures and Stationery’ window click ‘New’ to create a new signature. Type a name for your signature and click OK.
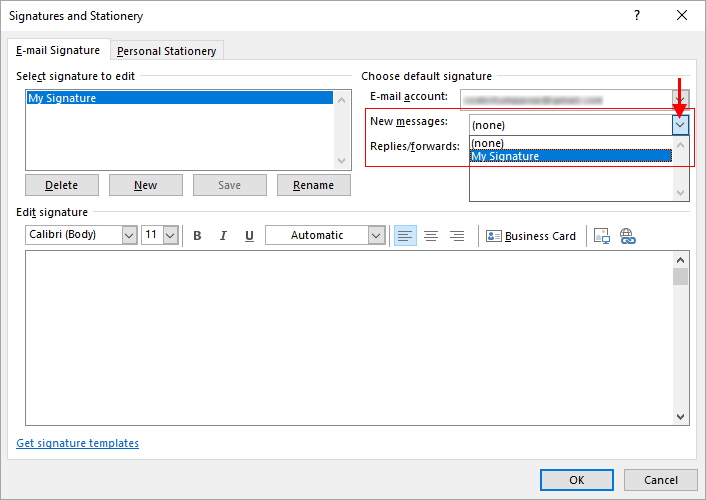
- In the ‘Edit Signature’ window, create a suitable signature or paste an HTML signature of your choice. After you’ve created the signature, select the email account of the shared mailbox and decide whether you want the signature to be added to new emails, replies, and forward messages.
What are the pros and cons of this method?
Pros
- You can set up signatures directly from Outlook
Cons
- Must have Microsoft Outlook installed on your computer.
- The filter options are not as advanced when compared to the OWA.
- Shared mailbox address has to be selected manually every time you compose an email.
- Limited signature formatting options, which is not suitable for professional signatures.
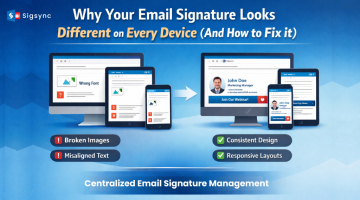
Add Office 365 signatures to shared mailbox with Sigsync
The previous methods of setting signatures to shared mailboxes have limitations, which do not allow you to centralize or manage signatures from a single location. Sigsync is a centralized and cloud-based email signature solution for Office 365 that can help you manage signatures for shared mailboxes, aliases and different signatures for different departments and groups.
The following steps describe how to create a signature for a shared mailbox in Office 365 with Sigsync email signature manager.
Prerequisites: A web-compatible browser. Sigsync works on all devices and is compatible with all email clients.
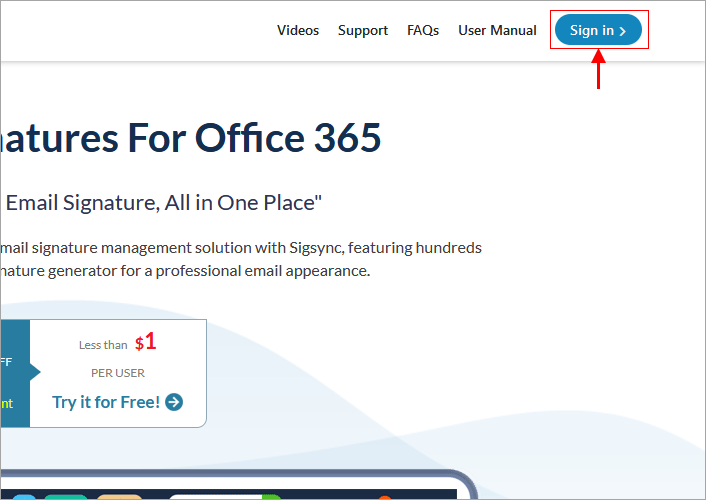
Step 1: Sign up with Sigsync using your email or Microsoft 365 account
- Go to Sigsync Office 365 email signatures and set up a new account. If you are a new user, add an Office 365 tenant to start configuring signatures for it.
If you already have an account with Sigsync, You can directly log in to the dashboard.
Step 2: Create a signature for your tenant from the Sigsync editor
- In the Sigsync Dashboard, click on ‘Signature Editor’ and select the tenant name to which you want to configure signatures. Learn how to set up signatures in the Sigsync editor.

- For the shared mailbox address, fill out the values such as Name, Address, Company Name or use the Active Directory (AD) component to dynamically retrieve the fields values.
- After you create the signature, save the template and click ‘Set Signature Rules’
Step 3: Assign the signature rules to the shared mailbox
- In the Signature Rule page, give a name to your rule and select ‘Senders’. Learn more about how to configure rules in Sigsync.
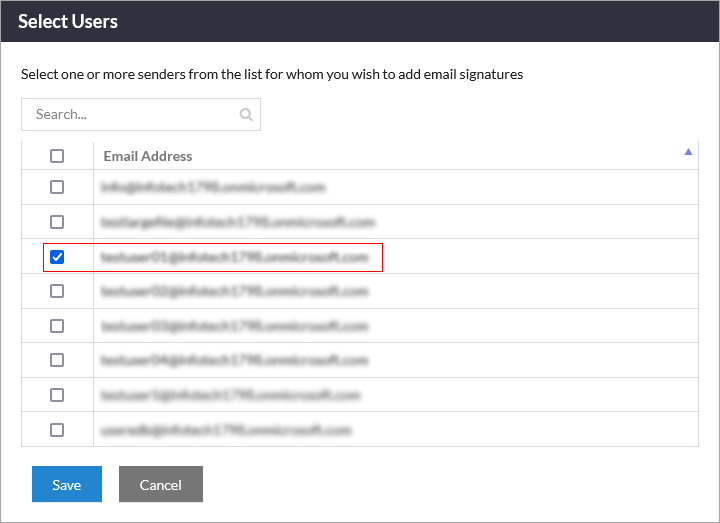
- Under ‘Add Signature-based on Senders’ choose ‘Selected Senders’ and click ‘Edit’ as shown.
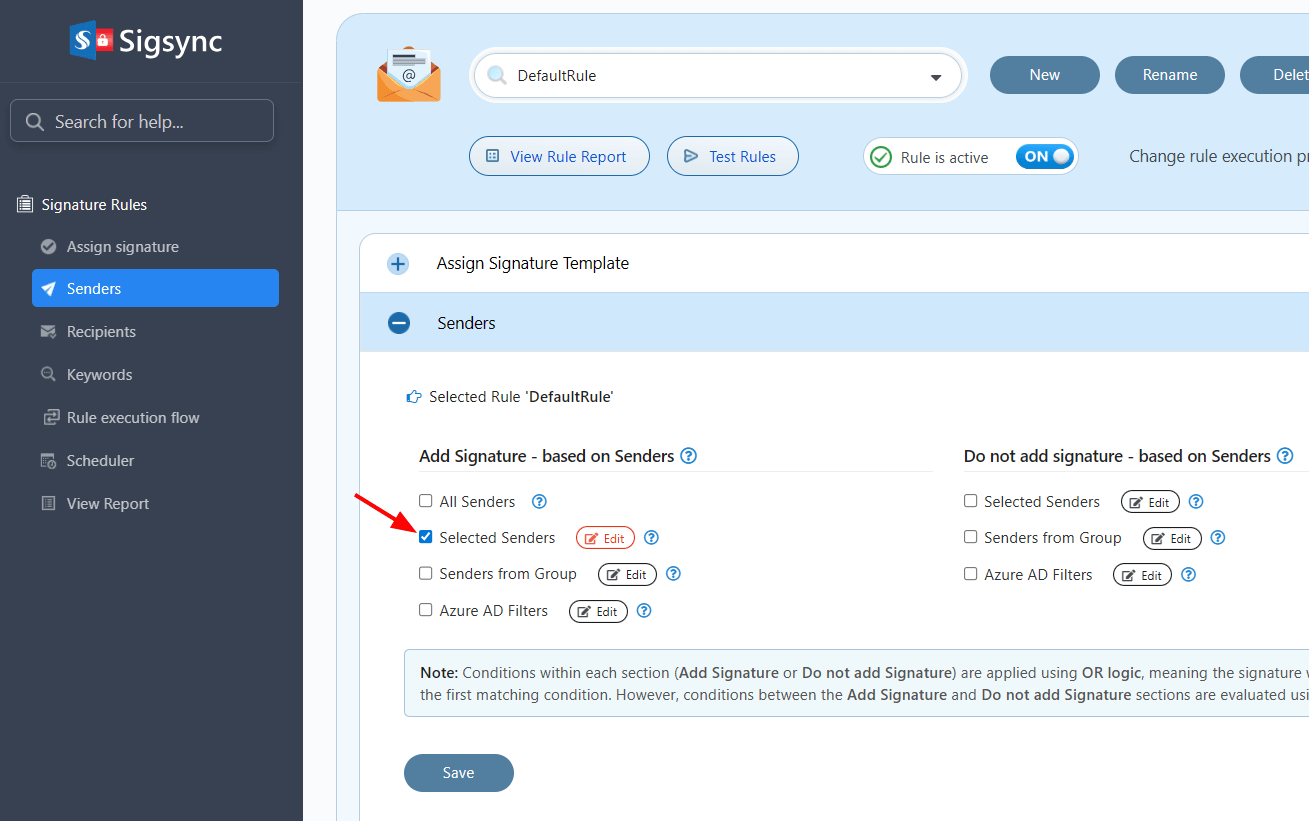
- Select the shared mailbox address from the list and click ‘Save’.
This step assigns the signature you created to the shared mailbox rule, and any email sent from the shared mailbox address will get this signature.
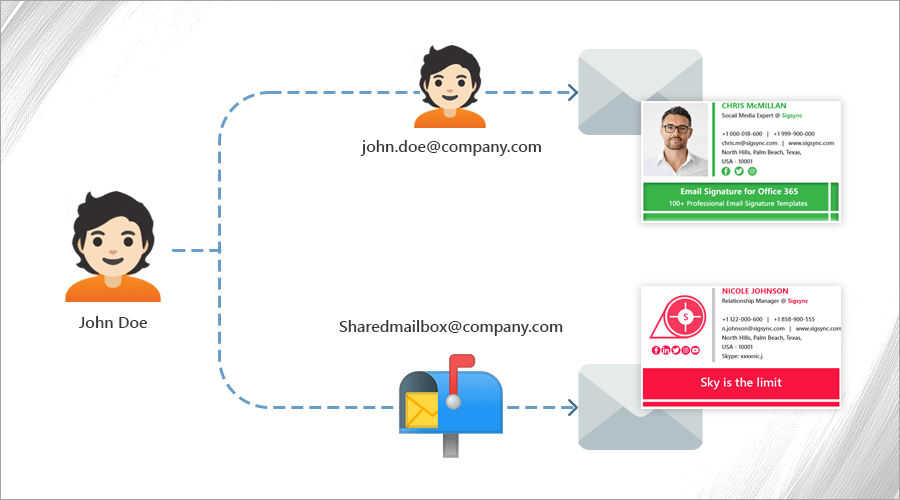
Note that the signature can change depending on how the rights and permissions are assigned to the user.
- If a user who has the ‘Send as’ permission sends an email from the shared mailbox, the emails get the signatures designed for the shared mailbox.
- If the user has the permission ‘Send on behalf of’, then the signature from the user mailbox is added to the message. Learn more
Tip: It is also possible to set signatures to a shared mailbox based on the keyword rules, which enables you to have different signatures for different members of the shared mailbox. For instance, if you have two users User1 and User2, you can configure two different signatures for these users who send email from the shared mailbox.
Step 4: Configure additional rules and save the changes
You can experiment with the other rules to add/disable signatures based on the senders, recipients and keywords. Sigsync also has the option to schedule signatures for marketing campaigns. After you set the required rules, click ‘Save Changes’.
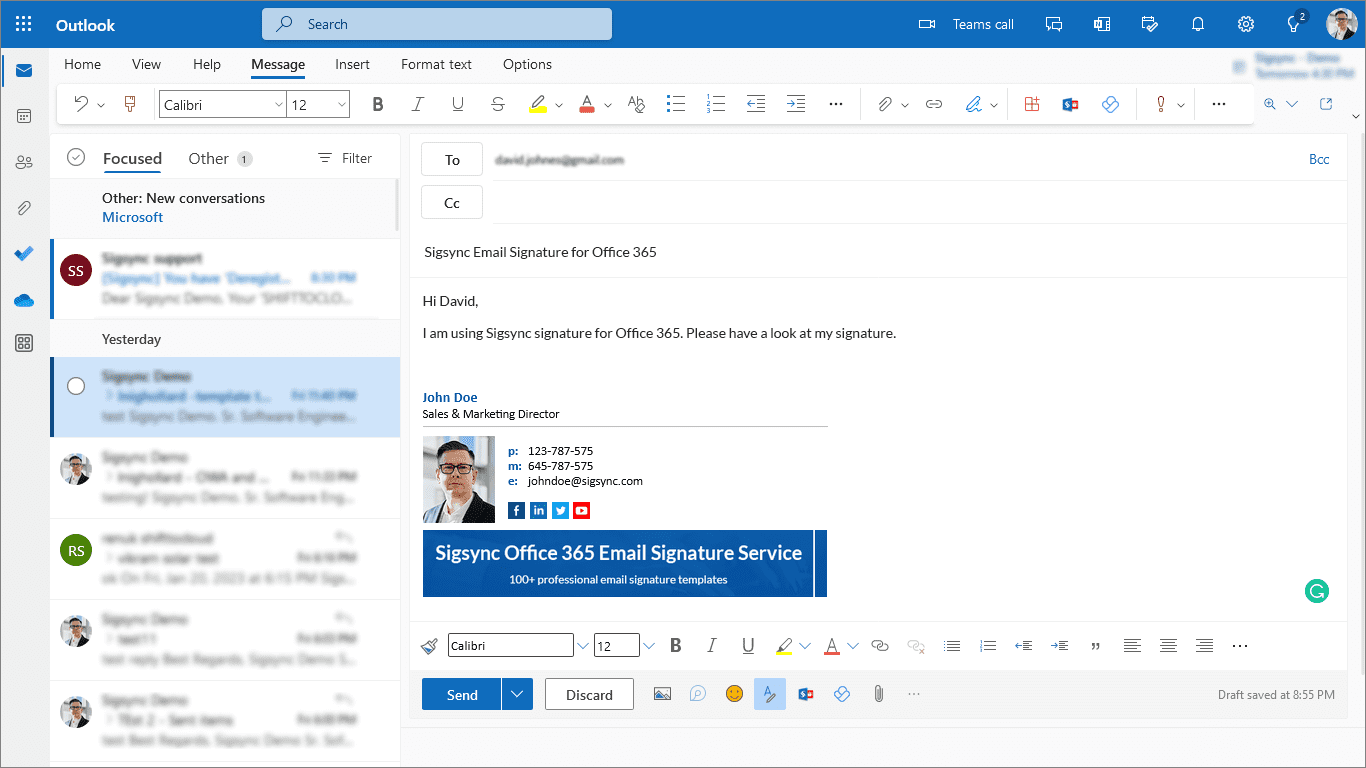
Step 5: Send a test mail and verify the shared mailbox signature That’s it!
Compose a new email and send it to yourself (the shared mailbox address). Verify if you are getting the signatures correctly.
Benefits of using Sigsync email signatures for Office 365
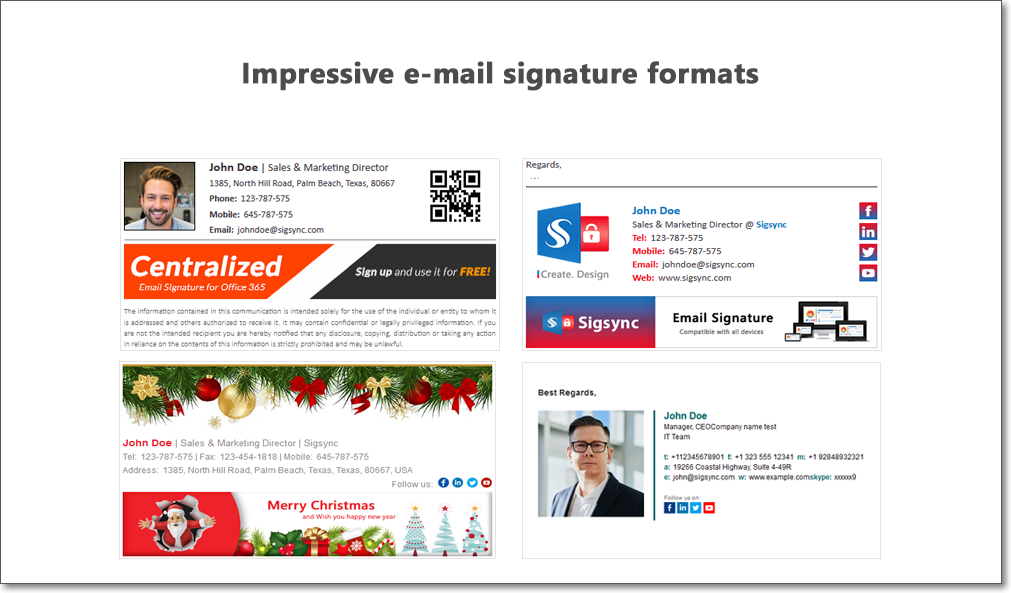
- Choose and customize from more than 160+ ready-to-use templates.
- Manage all the signatures under one single roof with cloud-based and centralized features.
- Set up professional signatures in minutes without requiring HTML skills.
- Add mobile optimized signatures including signatures under the latest forward and reply emails.
- Add signatures and disclaimers directly while composing an email.
- Configure signatures for different departments, projects, teams and groups.
- Best of all, maintain your corporate identity across the entire organization.
Sigsync has a free trial version that enables you to test all the features to your heart’s content. Contact our free 24/7 customer support team who are more than happy to help you configure the signatures. Sigsync also provides free of cost signature design service to suit your business needs. Try it for free today!
More information about Sigsync signature service can be found visiting https://www.sigsync.com/kb/faq.html