When the entire world was taken over by email communication, there was no looking back at the days when communication used to be mainly carried out by writing postal letters. Paper letters or postal mails as they were called, were written personally using ink and signed at the bottom. Many people still get nostalgic just at the thought of it. Some even feel sentimental as these letters carried a personal touch. Mail communication on the other hand was digital and typed on a computer. It now supports almost all the devices. Digital messages look all the same for a recipient as they do not contain any handwritten emotions. But they are faster, comfortable and even free of cost. Big attachments, photos, and even files can be shared. They are protected from elements like rain, dust and arrive at the recipient crisp and clean. There is absolutely no need to run errands to the nearest post-office or wait in long queues to get the letter delivered. One can quickly send an email even in the middle of the night. No wonder, the globe is shrinking as we rightly call. For users making a transition from postal letters to email, this might seem like a tough climb. They wish to make their email more personal just like a paper letter. This is possible, all thanks to advanced technologies. Users can now add personalized signatures, images, greetings and even emojis in an email. The on-click customization of an email makes the postal letter seem old fashioned. For business users, adding an email signature is not only a matter of external appearance but also for financial gains. If your organization is using Office 365 for communication, then this guide is exactly for you. In this article, let us look into a basic step-by-step procedure on how to create an email signature for your account.

Free Email Signature generator
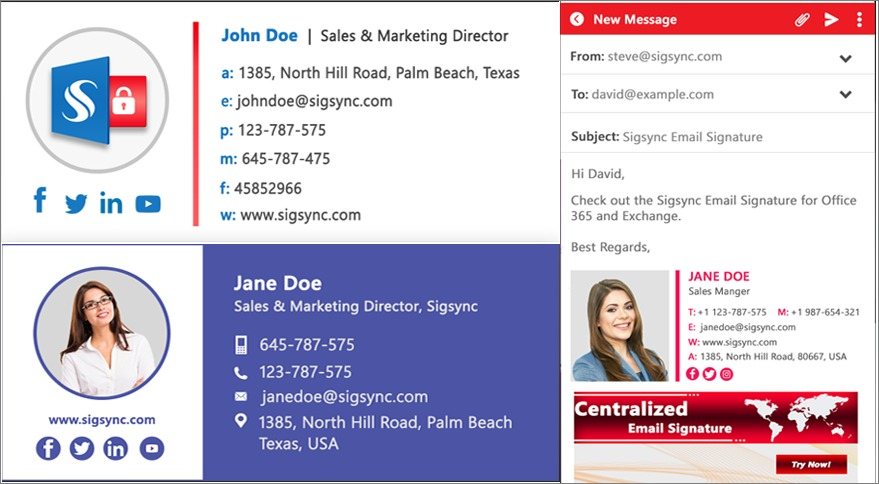
Free online HTML Email Signature Generator that helps to create professional and visually compelling email signatures by adding your logo, brand colors, contact details and etc.,How to add email signature from the Outlook Web App (OWA)
Step 1: Login to your Office 365 Outlook mail account using admin credentials.

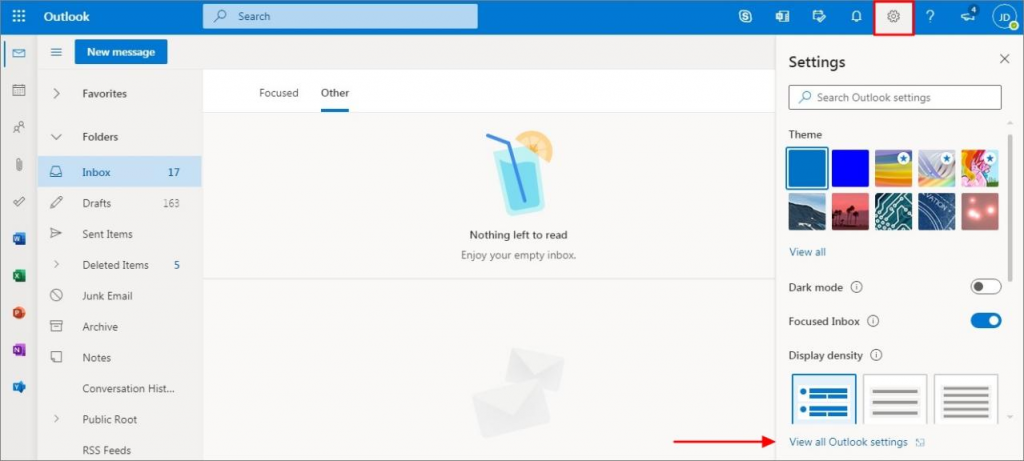
Step 2: Open the Settings by clicking the gear icon in the top-right corner. Then, click ‘View all Outlook settings’ at the bottom to continue.
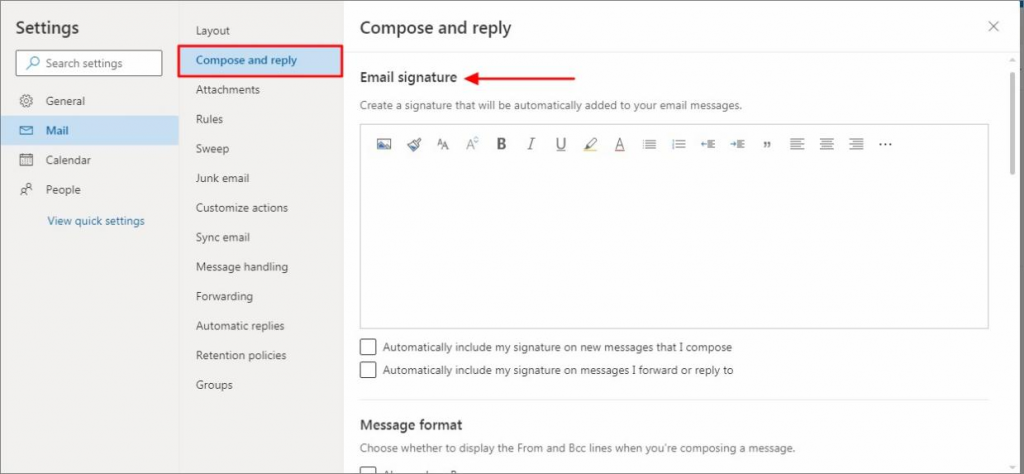
Step 3: Click on ‘Mail’ in the left hand sidebar and click ‘Compose and Reply’. In this window, you can create your own email signature and select whether the signature should be added to new messages and/or to replies and forwards.
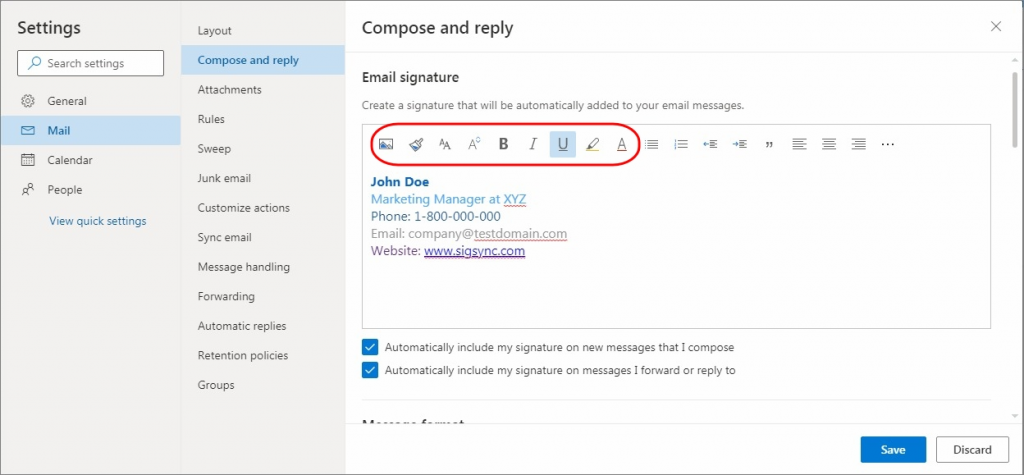
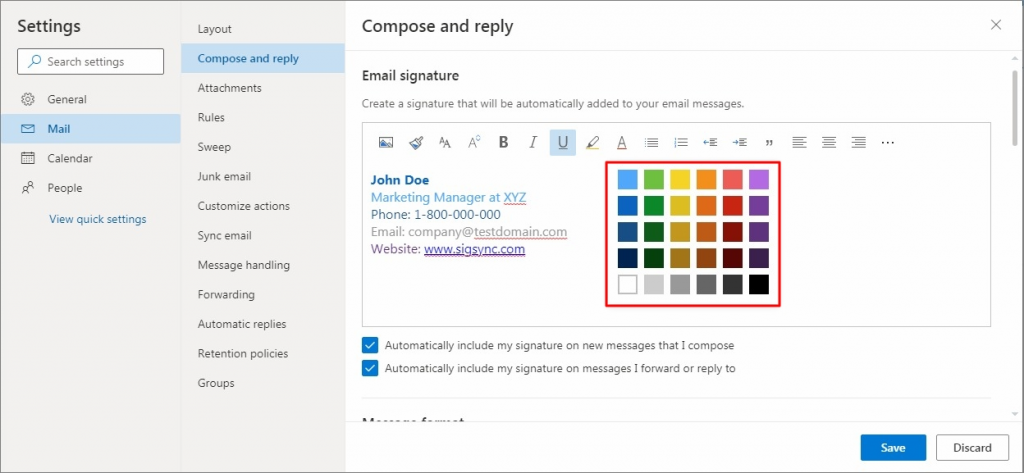
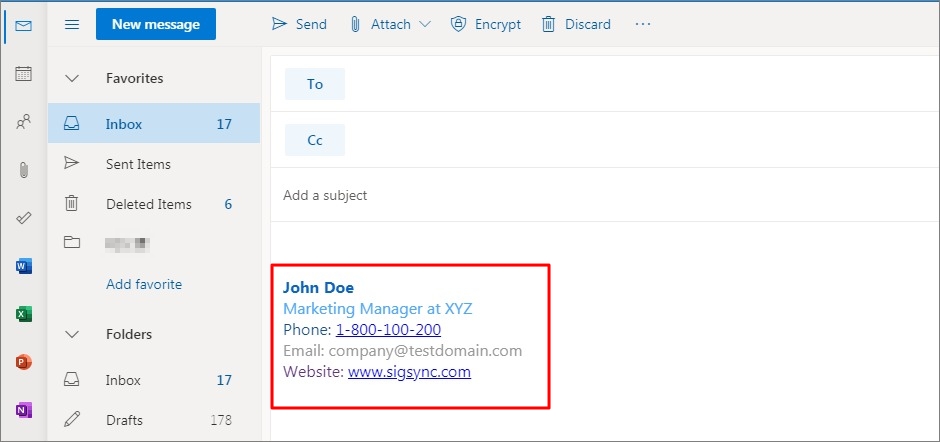
Step 4: You can edit your signature by making the text bold, using bullets, using different colors for the text from the palette as shown.
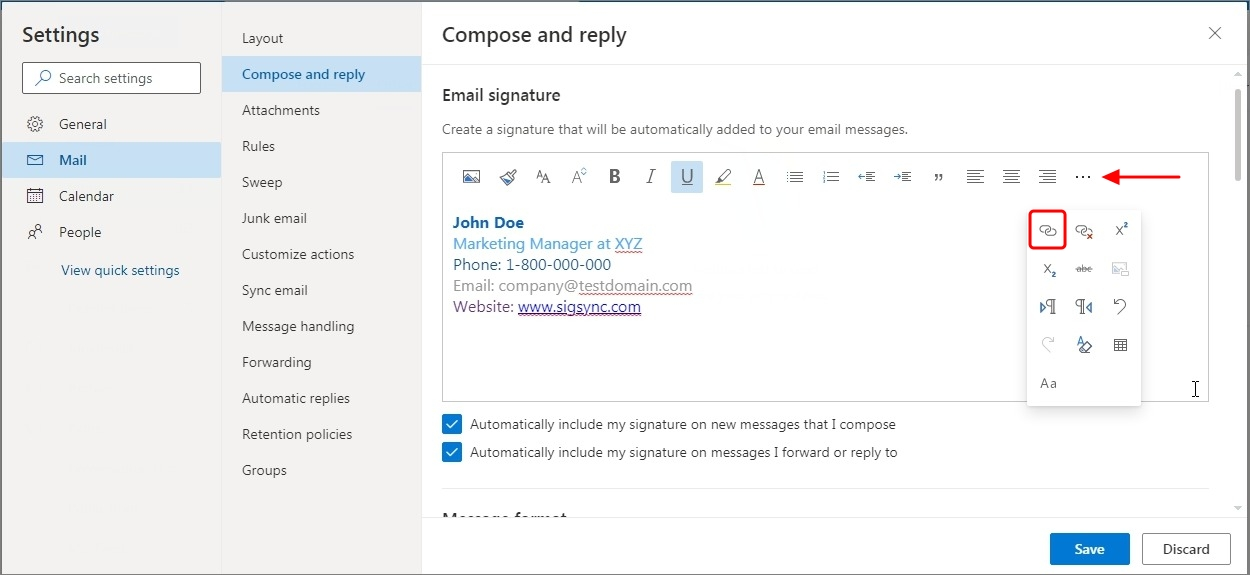
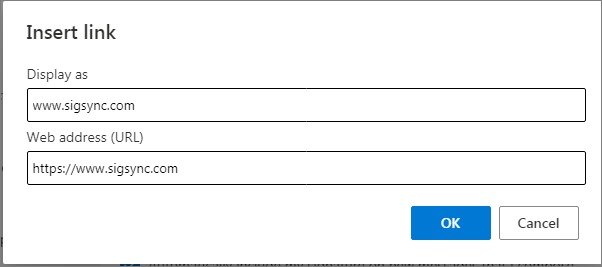
Step 5: You can create a clickable hyperlink for your website by clicking the three dots in the far right and selecting the paper-clip icon. Insert the URL of your choice and the text to be displayed and click ‘OK’.
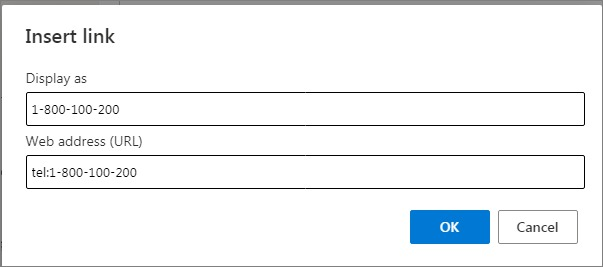
Step 6: To make a telephone number clickable, you need to select the phone number and click on the paper-clip icon as above. Enter the prefix as tel: followed by your number as shown.
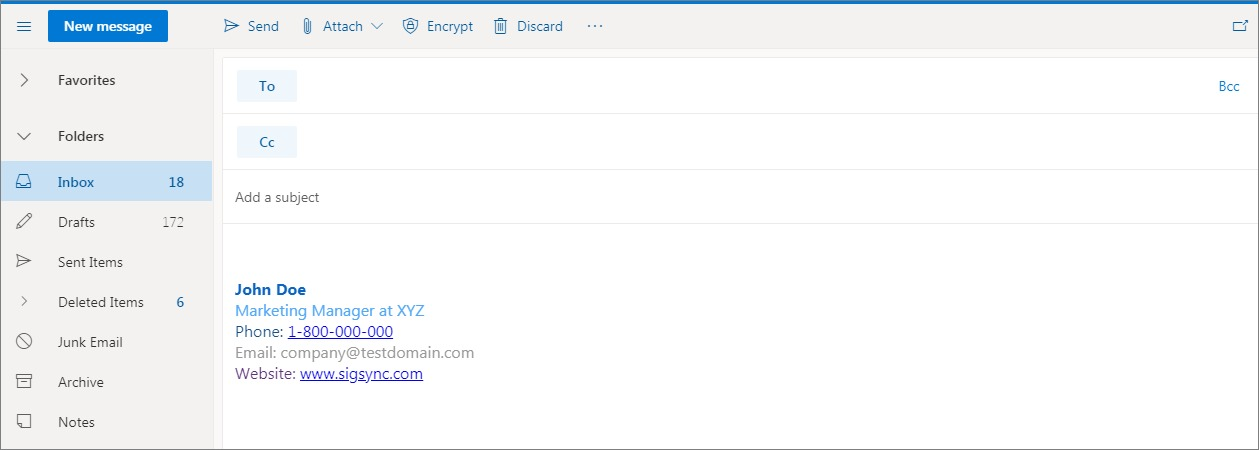
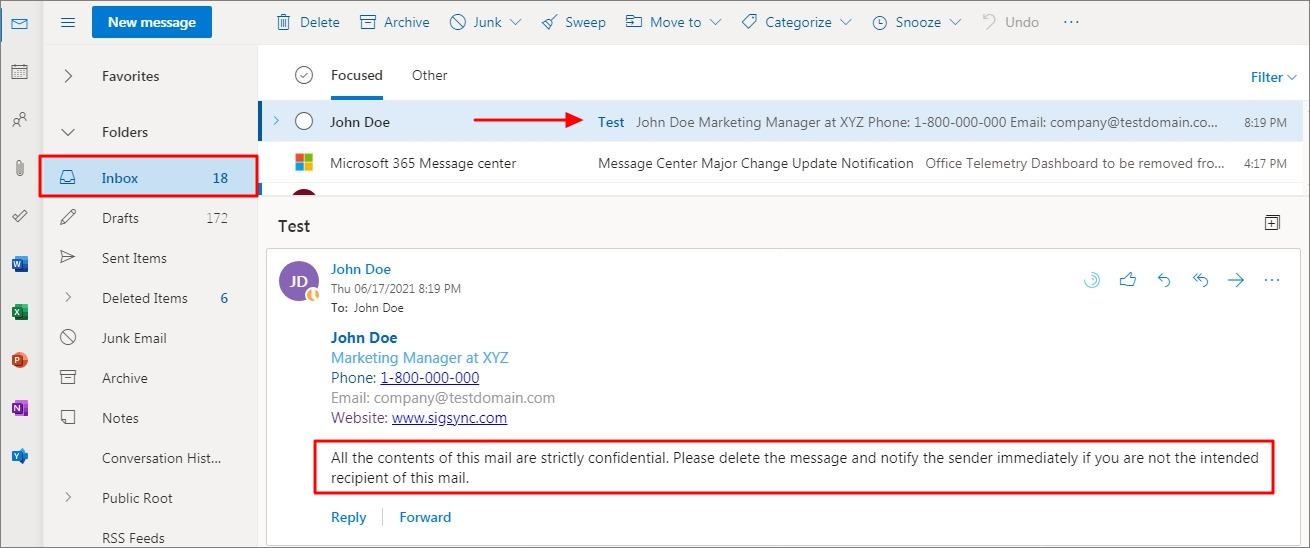
Step 7: You can preview your email signature when you click on ‘New Message’.
How to set rules for the Office 365 email signature?
Step 1: Login to your Office 365 account using this link https://www.office.com/.
Step 2: Go to Microsoft Admin center by clicking the ‘Admin gear icon’.
Step 3: Now, head to Exchange Admin Center as shown.

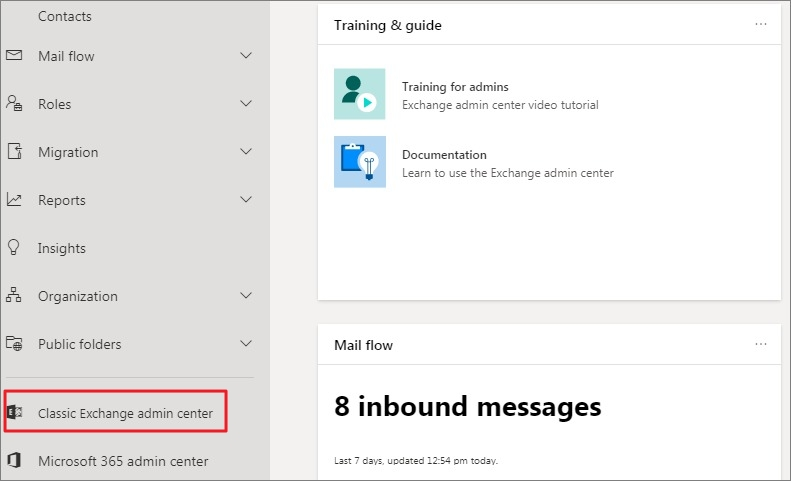
Step 4: Click the ‘Classic Exchange Center’.
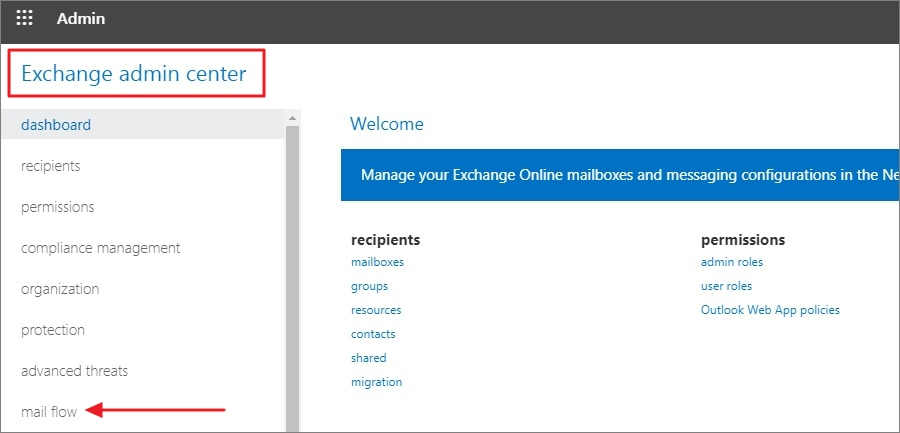
Step 5: In the classic Exchange Admin center head to mail flow.
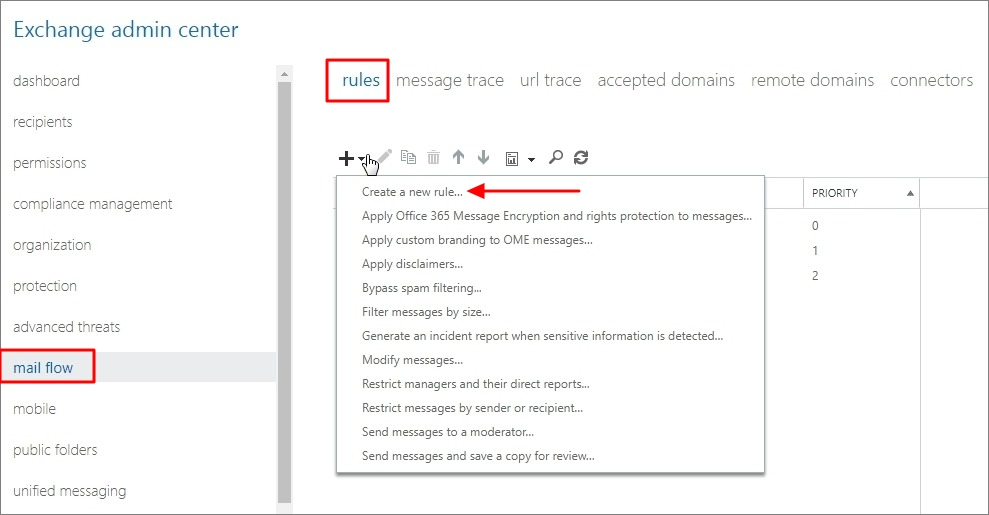
Step 6: Under rules, click on the + symbol to get a list of options as shown. Select ‘Create a new rule’.
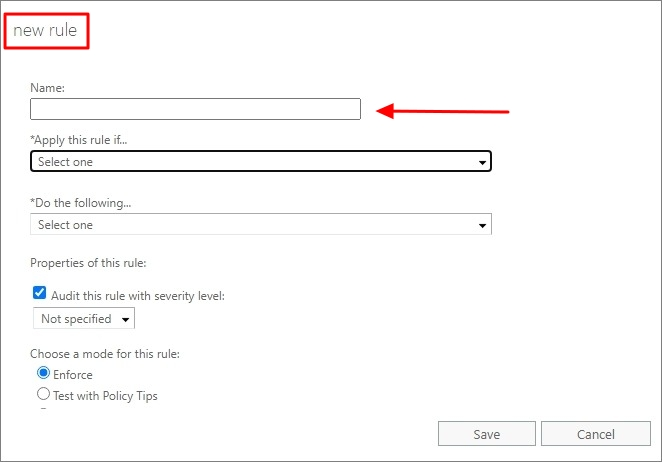
Step 7: A new window will open where you can name the rule.
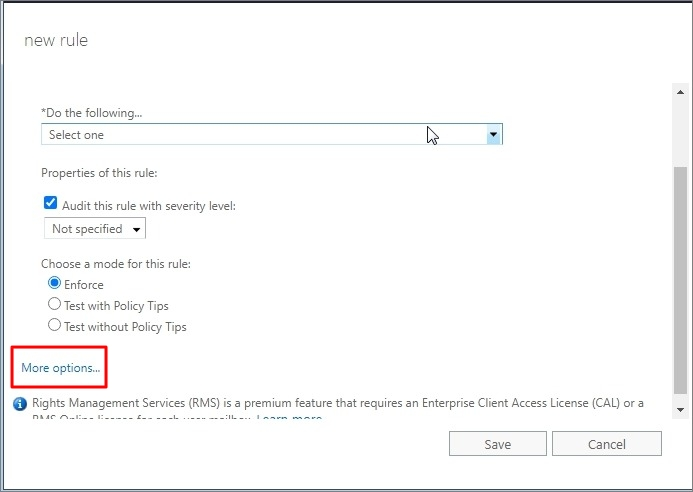
Step 8: At the bottom click on ‘More Options’ to display all the signature options.
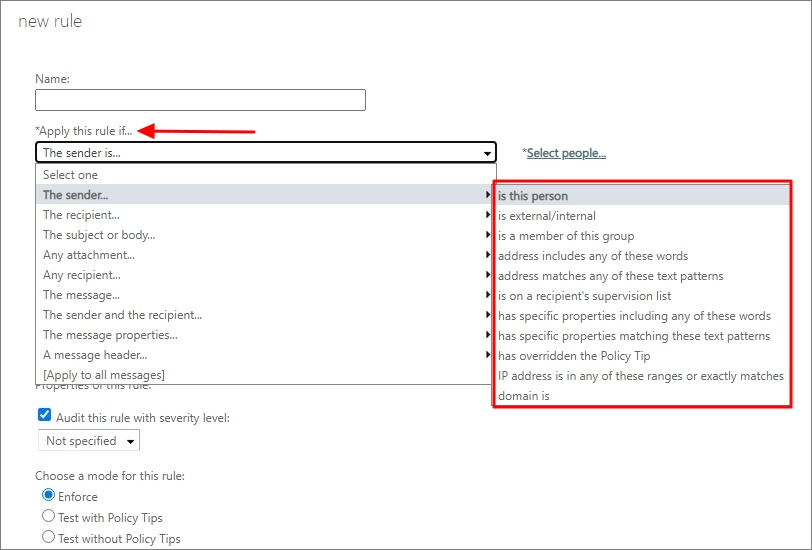
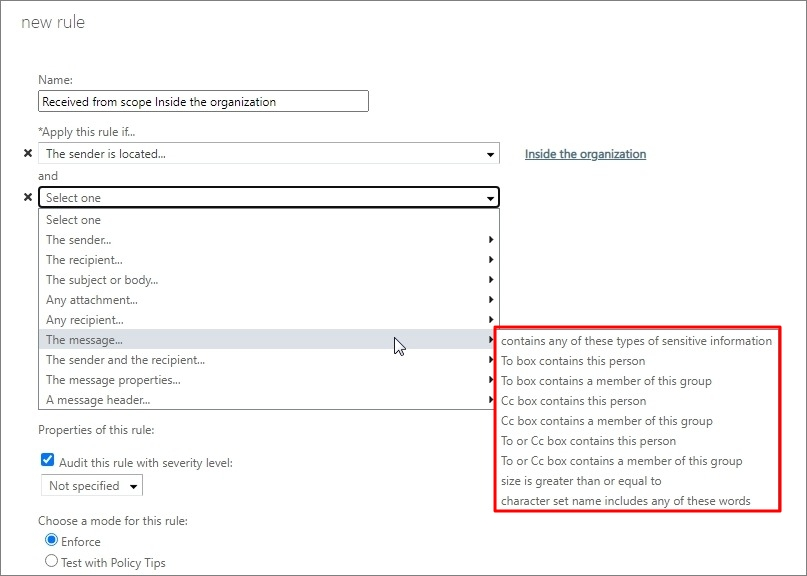
Step 9: Under ‘Apply this rule if…’ select the desired conditions whether you need to apply the signature to an external/internal person or a member from the group etc. You can create additional rules in the next drop-down menu as shown.
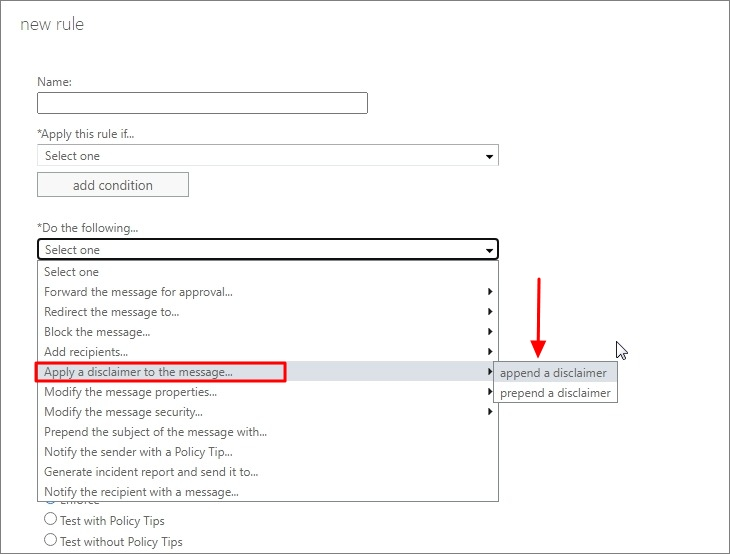
Step 10: Under ‘Do the following…’ select ‘Apply a disclaimer to the message’ and select ‘append a disclaimer’ if you wish to apply a disclaimer to your email signature.
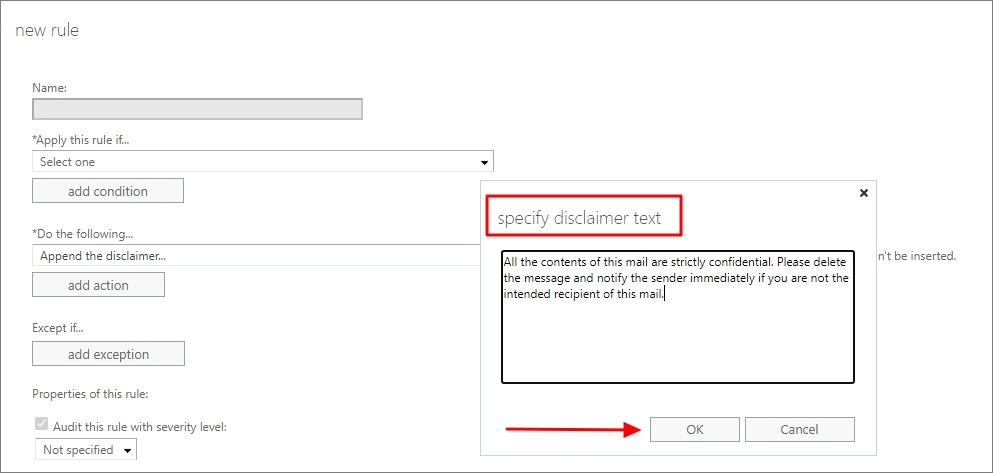
Step 11: Click on the ‘Enter text’ link which will open a new window to add a disclaimer text. Once done click ‘OK’ at the bottom.

The disclaimer has a fall-back option in case it cannot be inserted in the signature. You are presented with three options.
- Wrap – The message is enclosed in a new email envelope to which the signature is added.
- Ignore – If the disclaimer cannot be added, the mail is sent without the signature. One of the safest option among the three.
- Reject – The sender receives a message that the message could not be delivered.
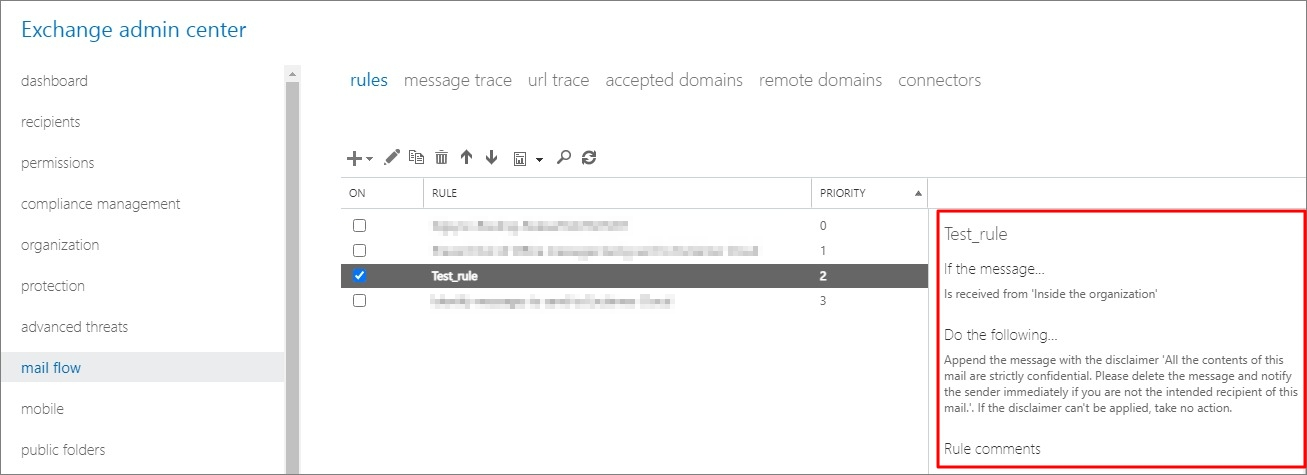
Step 12: You can check the status of your rule and even change the priority as shown. Once everything is done, head over to your Office 365 Outlook mailbox.
Step 13: In your mailbox, you can click ‘New Message’ to preview your signature again. As you can observe, the native method of adding the signature has no option to preview the disclaimer as outlined in this article.
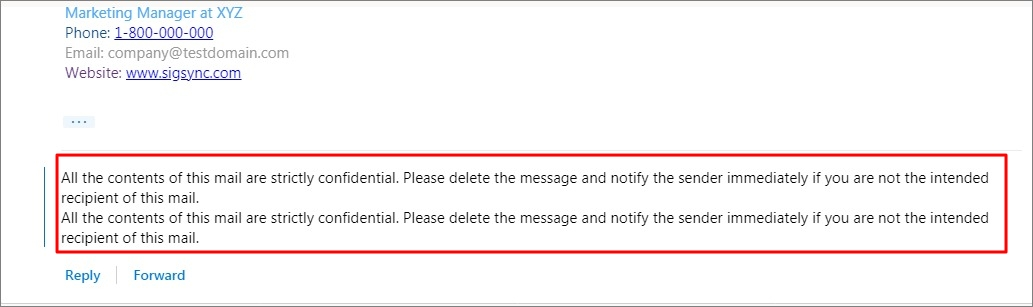
Step 14: To preview the disclaimer added, you need to send yourself a test email both plain text or HTML and verify whether the text added is correct. If an exception is added to avoid stamping the disclaimer to successive messages, forward the test message to yourself and check whether there duplicate copies of the disclaimer are attached.
What are the limitations using this native method?
Setting up email signatures in Microsoft Office 365 does have restrictions which are explained in this article. To briefly sum it up,
- Being unable to test different signature designs.
- Signatures don’t appear directly under each reply or latest forwarded email.
- No HTML email signatures on mobile application.
- Images are embedded as attachments and not within the page itself.
- Blank spaces or ghost entries in some user’s contact details.
- Lots of Transport Rules for different departmental signatures.
- Absence of uniform templates for the entire organization.
Are there other alternatives offering more features?
Sigsync is a cloud based Office 365 signature service with variety of customized templates to choose from and maintains your corporate identity across the entire organization in a single place.
Some of the note-worthy features of Sigsync are
- HTML code can be imported into the signature generator.
- Force HTML signature for all e-mail formats.
- Force HTML signature for all email formats.
- Set e-mail layout for chain/forward emails.
- Remove the signature added by mobile.
- Signature can be added/skipped for encrypted and digitally signed messages.
- Highly Secure and Reliable.
- Automatic retrieval of Azure AD values.
- Automatic updation of signature in ‘sent-items’ for maintaining legal compliance.
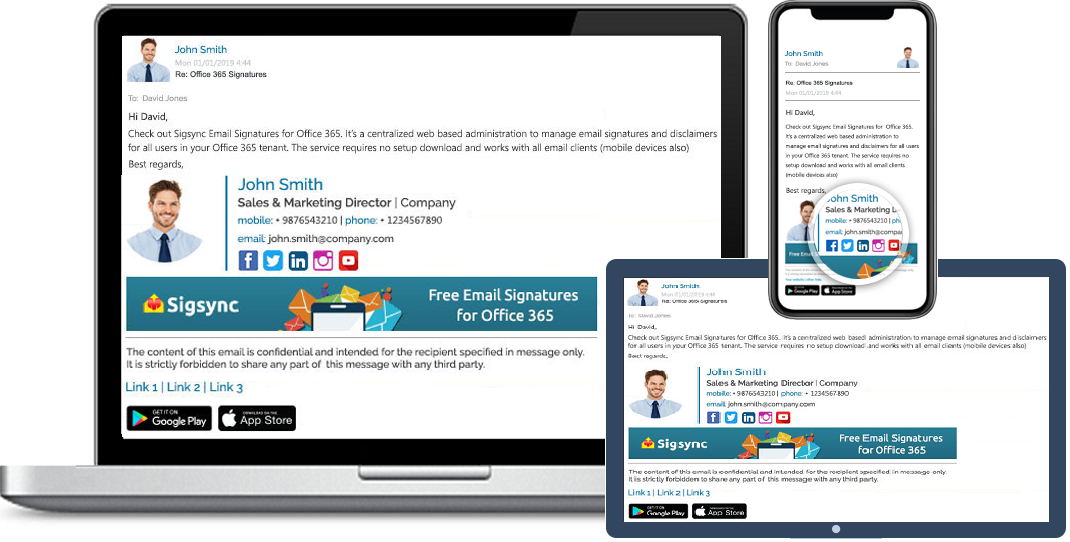
Free Office 365 Email Signature
Free Office 365 Email Signatures manager allows you to centrally manage email signatures.Consistently deliver your brand-compliant Office 365 Email signatures company-wide.More information about this excellent signature service can be found visiting https://www.sigsync.com.