In one of the previous articles, we have covered how to insert an email signature for your Office 365 account. In this blog post, let us look at how one can insert images and play around with HTML code in email signatures.
How to add image to an email signature in the Outlook Web App (OWA)
Step 1: Login to your Office 365 Outlook mail account using admin credentials.

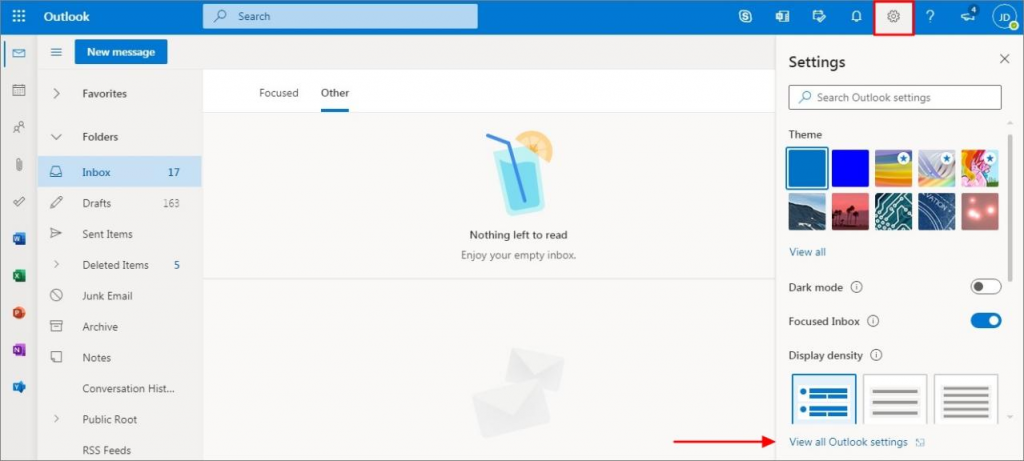
Step 2: Open the Settings by clicking the gear icon in the top-right corner. Then, click ‘View all Outlook settings’ at the bottom to continue.
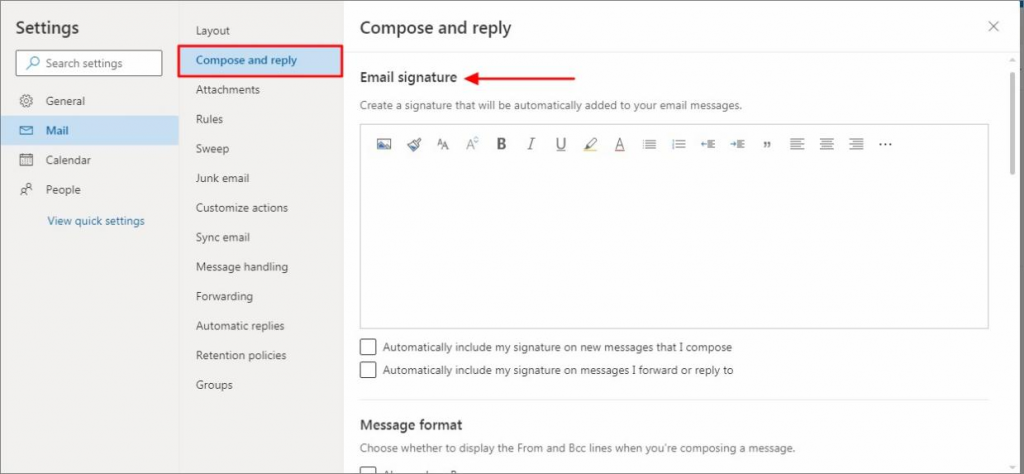
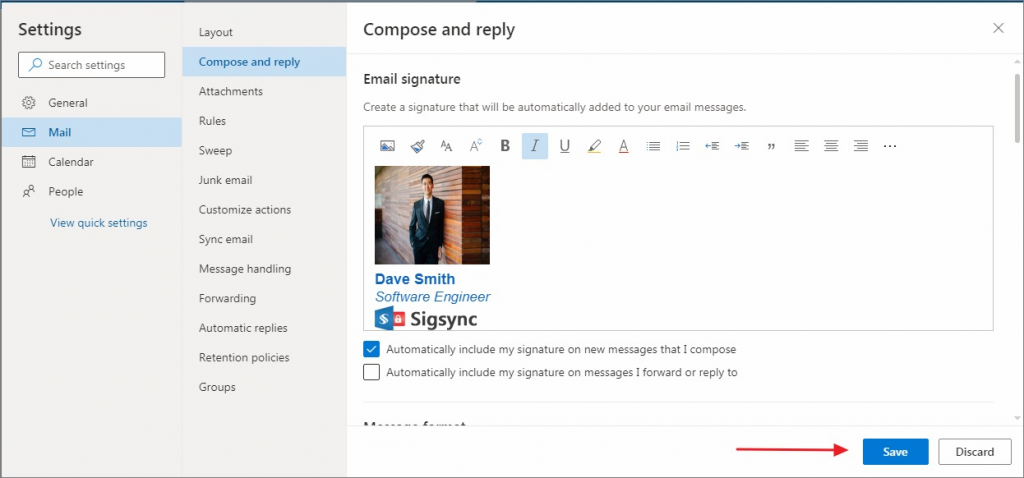
Step 3: Click on ‘Mail’ in the left hand sidebar and click ‘Compose and Reply’. In this window, you can create your own email signature and select whether the signature should be added to new messages and/or to replies and forwards.
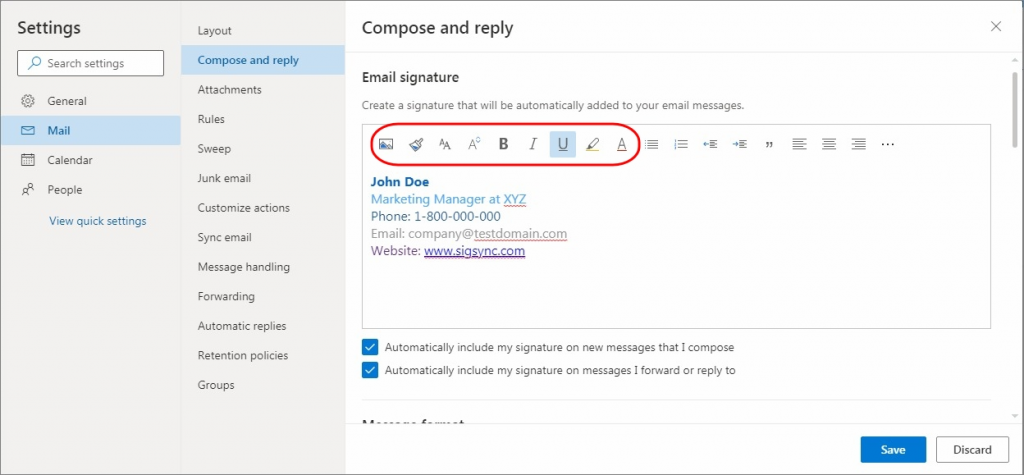
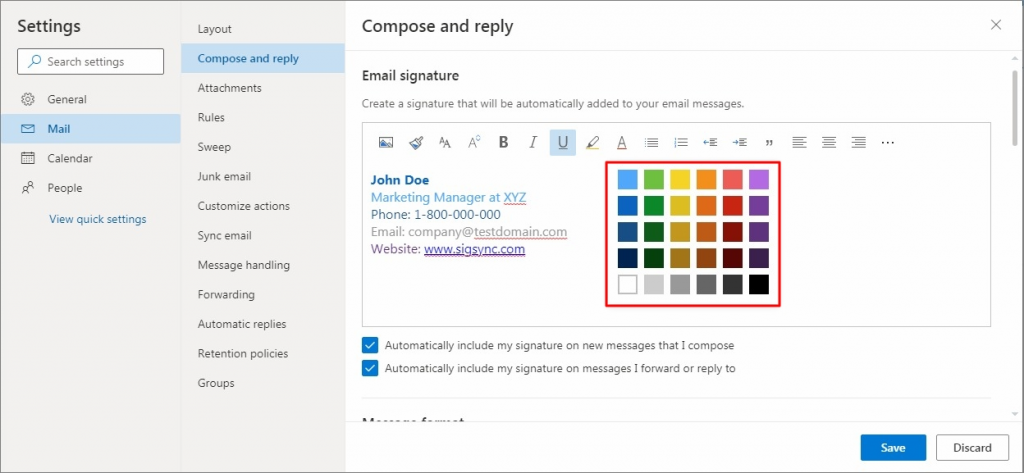
Step 4: You can edit your signature by making the text bold, using bullets, using different colors for the text from the palette as shown.
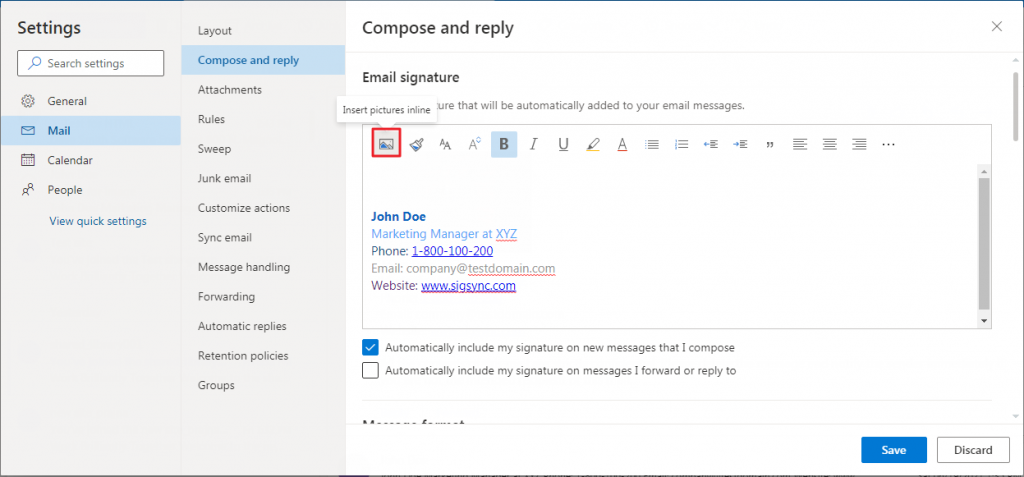
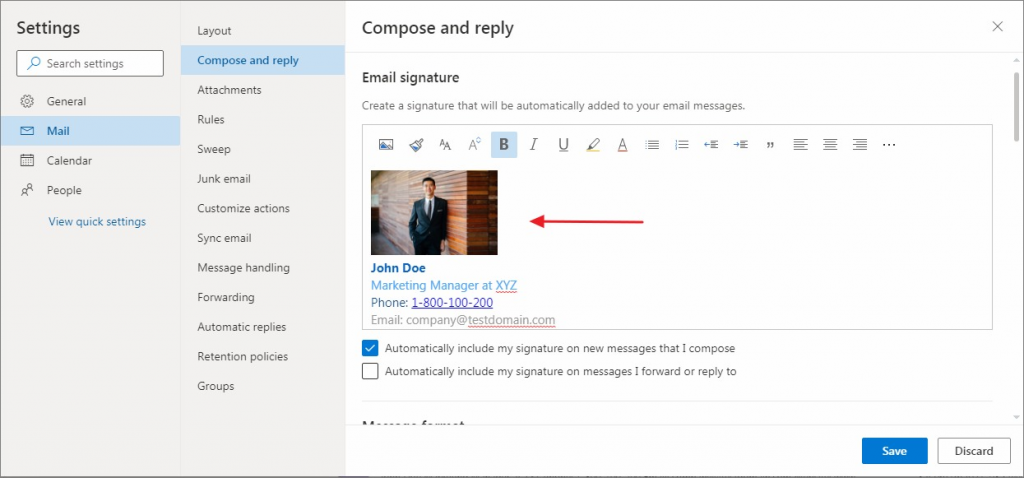
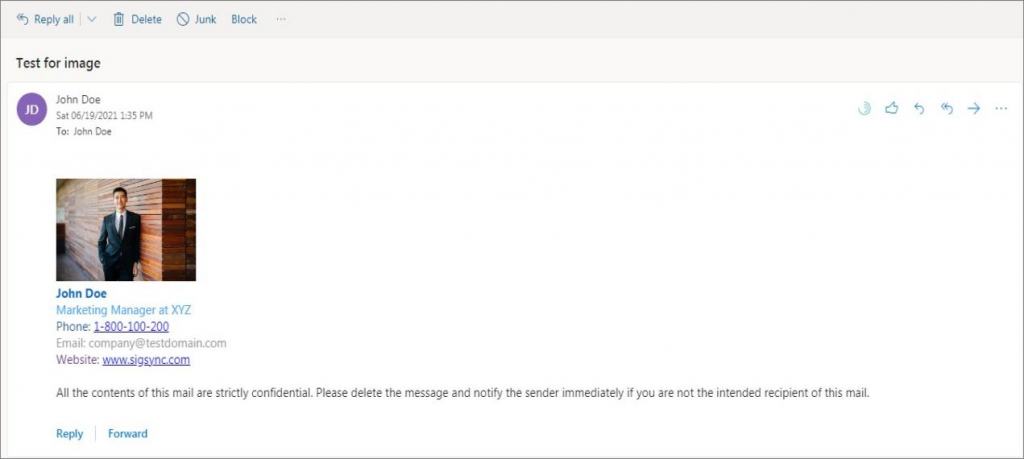
Step 5: To insert an image, click on the image icon from the signature palette. Browse for the required image on your PC and click Open. Your image will be inserted as shown. Click ‘Save’ at the bottom.
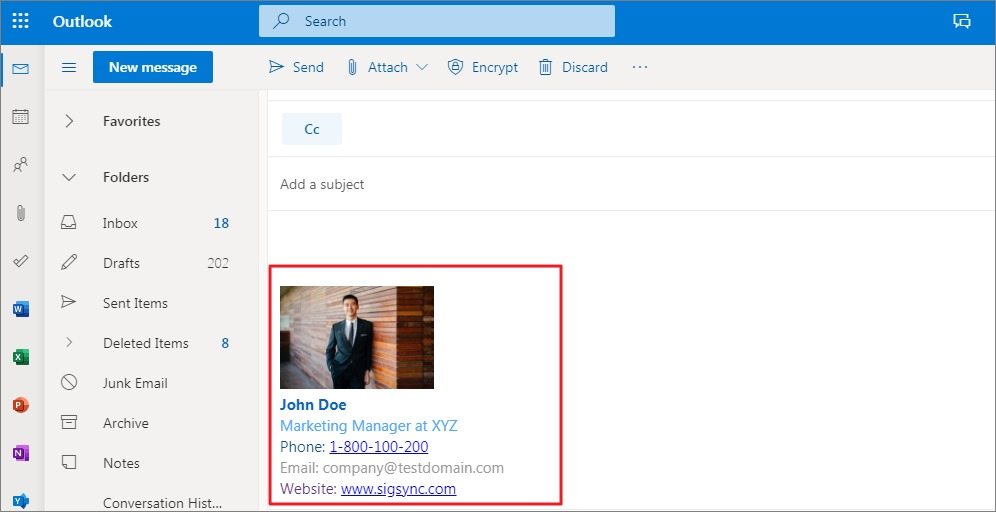
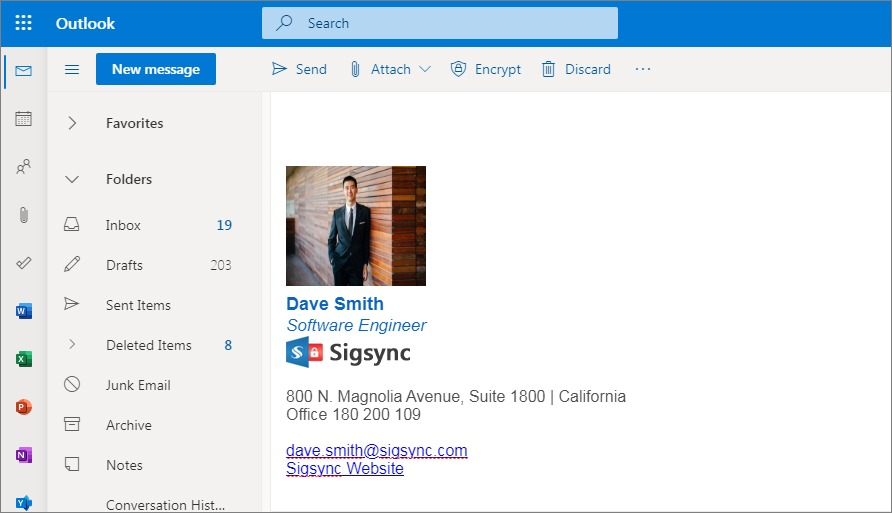
Step 6: You can preview your image in the email signature when you click on ‘New Message’. Here the image is embedded in the email. You can also use a linked or a hosted image. In an embedded image, the image is inserted in the email as an attachment or a file. In the linked image, you can host the image on a website and insert the image from the link.
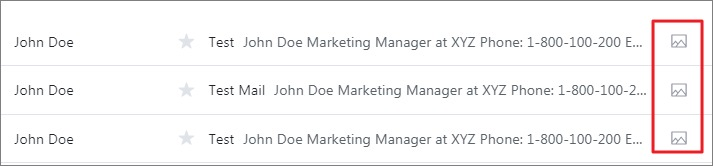
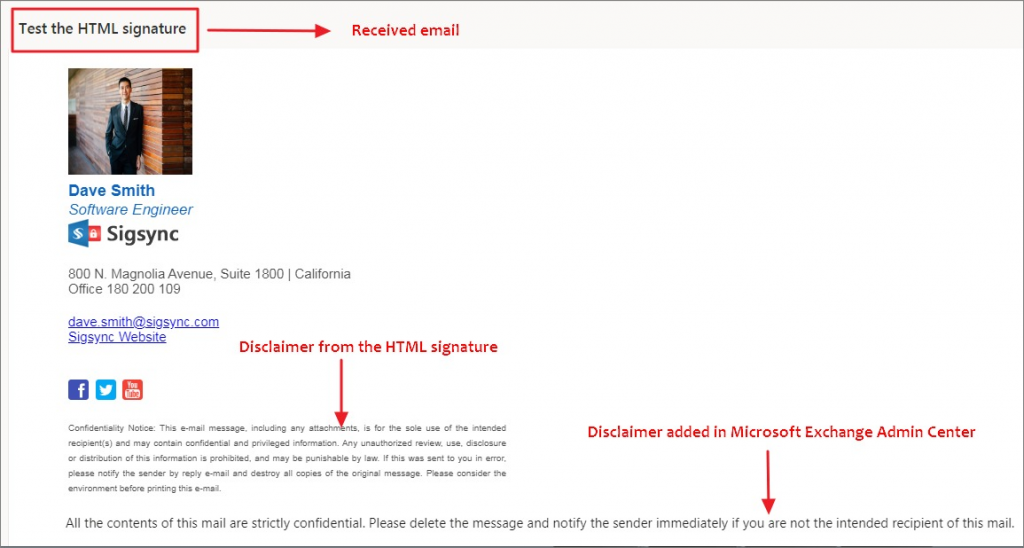
Step 7: Send yourself a test message to check for the display and layout of the message. The disclaimer added from the ‘Exchange Center’ can be seen here in the received message only. Also the received message does not have any embedded image attachments as depicted when compared to inserting the images manually in the signature.
What are the pros and cons of embedded and linked images?
Linked Images
PROS
- Cannot be blocked by anti-virus software. This is a great advantage in the successful delivery of the email with the linked images.
- It will never increase email size. Hence there is the possibility of email getting rejected or blocked by email clients due to the size limit.
CONS
- Images may not be displayed automatically in some of the email clients (recipient must click a ‘download images’ button or change settings for the specific sender)
- The recipient has to be online to view the images as images are directly viewed from the linked URL
- If the linked URL is not accessible or it is deleted / renamed then signature image display may be affected
Embedded Images
PROS
- Images will be displayed automatically when the email is viewed
- You can view it when the email client is offline.
CONS
- Some of the email clients may reject and email may be blocked by anti-virus software
- Since you are directly embedding the image into your signature, there will be a direct increase in the size of the email. This may cause emails to get rejected due to the size limits.
- Some of the email clients may convert embedded images as attachments. This may distort the signature view
How to insert HTML email signature in Office 365?
One of the biggest limitations of inserting images in the signatures as illustrated above is that the image is attached as a file. It may be displayed perfectly on your desktop PC, but might be totally distorted when viewed on a smartphone. If the recipient has chosen to block images, your well-designed profile image is not displayed until the receiver chooses to allow displaying images. All the hard work goes down the drain in such scenarios. As we can additionally observe, the disclaimers cannot be previewed before sending an email. It is very cumbersome to send a test mail every time to check for the correctness of the disclaimer text. In addition to that, if it is a big organization, it is even more tedious to track who included a disclaimer and who did not. One wrong move and there are chances that you can land in a hot soup and get caught in the web of legal complications. A possible solution to overcome this problem is to use HTML signatures. In an HTML email signature, the images and disclaimers become a part of the HTML code. You can easily preview it before sending and the images are also not blocked by the recipient’s mail client as the entire content is treated as a single HTML page. There are no unnecessary attachments occupying precious storage space. A win-win situation for everyone. Here, let us look at how to insert HTML signatures in an email manually.

Step 1: You can use a notepad or a HTML editor to type in your HTML code as shown. You can use existing HTML templates on the web or create your own if you have the required HTML coding skills. Once you are happy with the layout, you can save it as a .htm file on your PC.
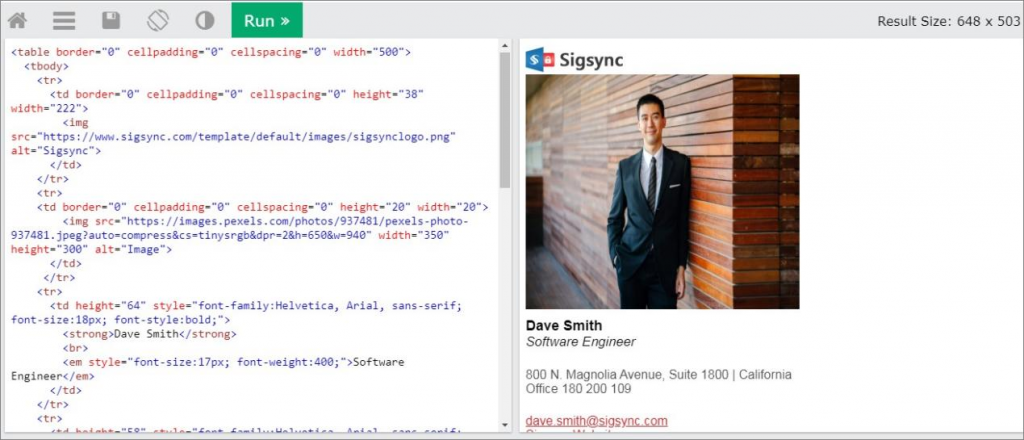
Step 2: Open the .htm file on your browser. Press ‘Ctrl+A’ and ‘Ctrl + C’ to select and copy the entire HTML signature. Now head over to your Office 365 Outlook email.

Step 3: Open the Settings by clicking the gear icon in the top-right corner. Then, click ‘View all Outlook settings’ at the bottom to continue.
Step 4: Click on ‘Mail’ in the left hand sidebar and click ‘Compose and Reply’. In this window, you can paste your HTML signature you just created and copied from the browser. Press ‘Ctrl +V’ to paste.
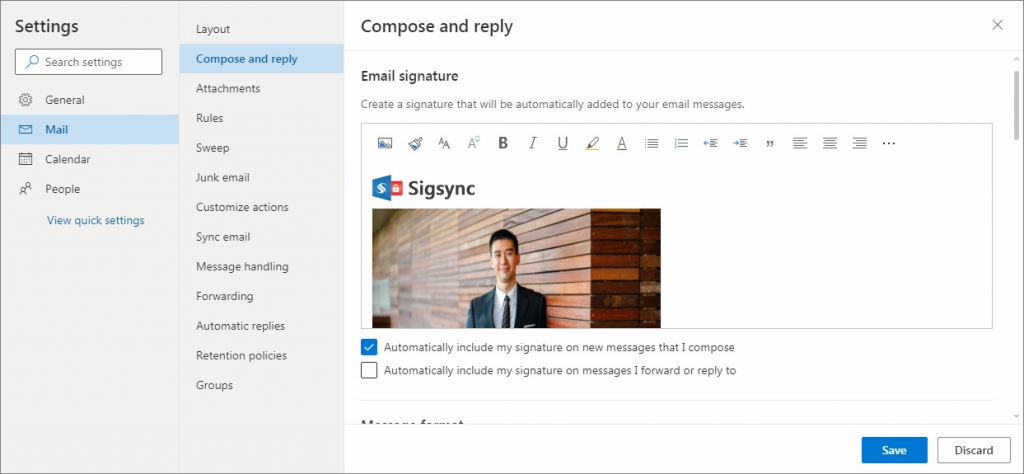
Step 5: You can view the HTML signature in this window, drag and drop the icons, minimize the image as you like an so forth. Once satisfied with the template, click ‘Save’ at the bottom.
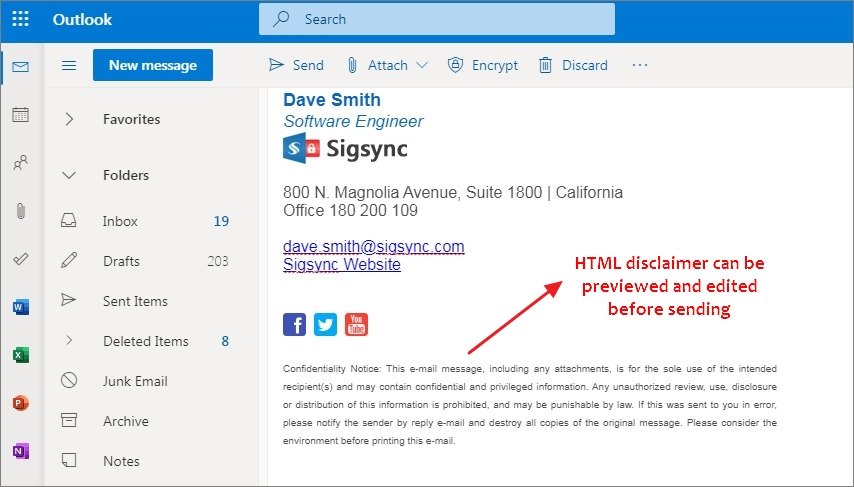
Step 6: Click on ‘New Message’ to preview the signature before sending. You can observe that you can add social media icons, logos and banners to your HTML signature. The disclaimer text also can be previewed for each message on the fly and can even be edited before sending. However, the disclaimers added from the Microsoft Exchange Center cannot be previewed before sending the mail.
Step 7: Send yourself a test message to check for the display and layout of the message. The disclaimer added from the ‘Exchange Center’ can be seen here in the received message only. Also the received message does not have any embedded image attachments as depicted when compared to inserting the images manually in the signature.

Can I use the HTML method of adding signature?
Using HTML in your email signatures is very convenient when compared to embedding images in the signature. But for large organizations, adding HTML signature manually come with certain drawbacks which are listed below.
- You need to know advanced HTML coding skills.
- Updating the HTML code every-time is laborious.
- You have to copy-paste the new template into the signature window from the editor after every update.
- There is no way to add HTML disclaimers centrally to the whole organization using the above methods. (The above procedure of inserting HTML disclaimer illustrates only for a single user)
- Email signature designs cannot be made consistent across a team.
- Signatures don’t appear directly under each reply or latest forwarded email.
- No option to import the HTML code, edit and test it on the fly.
Are there other alternatives which can do the process automatically?
Yes of course! Sigsync is a centralized and cloud based Office 365 signature service with variety of customized templates to choose from and maintains your corporate identity across the entire organization in a single place.
Some of the note-worthy features of Sigsync are
- Highly Secure and Reliable.
- HTML code can be imported into the signature generator
- Does not require any HTML coding or technical skills.
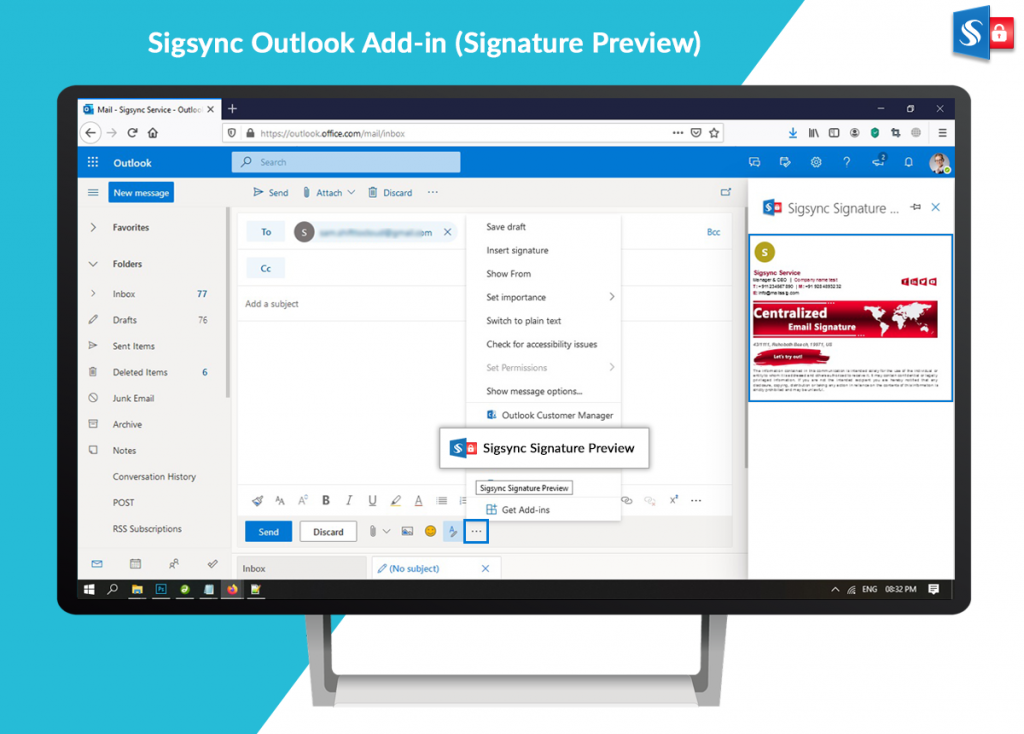
- Signature add-in previews the signature on the fly.
- Disclaimers and signatures can be centrally managed.
- Force HTML signature for all e-mail formats.
- Set e-mail layout for chain/forward e-mails.
- Remove the signature added by mobile.
- Automatic retrieval of Azure AD values.
- The signature can be added/skipped for encrypted and digitally signed messages.
With the trial version, you can test out all the features of Sigsync to your hearts content. There is also a personalized demo offered with a 24/7 customer service support. More information about this excellent signature service can be found visiting https://www.sigsync.com