Back in the days of the 90’s when computer and internet were taking baby steps, there was no method available to know if the recipient has read the mail which was sent and delivered to them. One possible method was to mail the recipients manually and enquire. But this was a tedious and time consuming method. Moreover if the email had landed in the ‘Spam’ folder, the recipient would not even have any clue about what’s going on. With fast developments in the technological space and thanks to some advanced features, we are now just a stone’s throw apart from one another. Email communication has also revolutionized over time where we can include eye-catching email signatures instead of exchanging those plain looking business cards. Utilizing this cool opportunity, a company can now track an email by making use of analytics embedded in the email signature. A well crafted email might bite the dust if it is poorly marketed. In this article, let us look at some of the strategies of email marketing using the power of analytics.
What are analytics?
Analytics makes use of data, intelligence and user interaction to determine and evaluate consumer behavior, the products they like, the activities they perform like clicking a website, following a social media page and so forth. Email analytics let the sender know if an email has been opened or read, email areas with the most user interaction etc. For example, analytics evaluates the activity, conversion rate and user behavior on a website including how users visit, how many users visit , how long they stay, what action they perform, list of pages they visit to, whether they arrive the site via the links, social media etc.
How to add analytic links in Sigsync signature generator
Sigsync email signature service has various email tracking parameters like analytics, one-click surveys etc. Let us understand how to add the ‘Analytic link’ to the Office 365 email signature by following some simple steps.
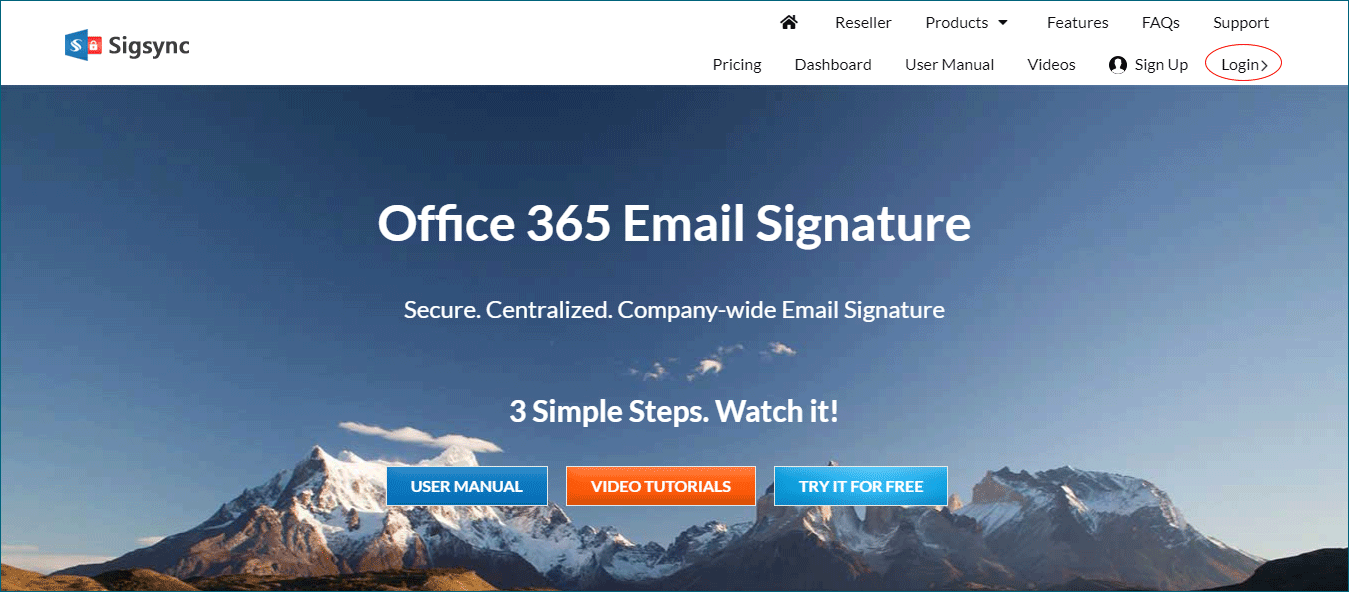
Step 1: Headover to https://www.sigsync.com and click the ‘Login’ button in the top right corner of the page.
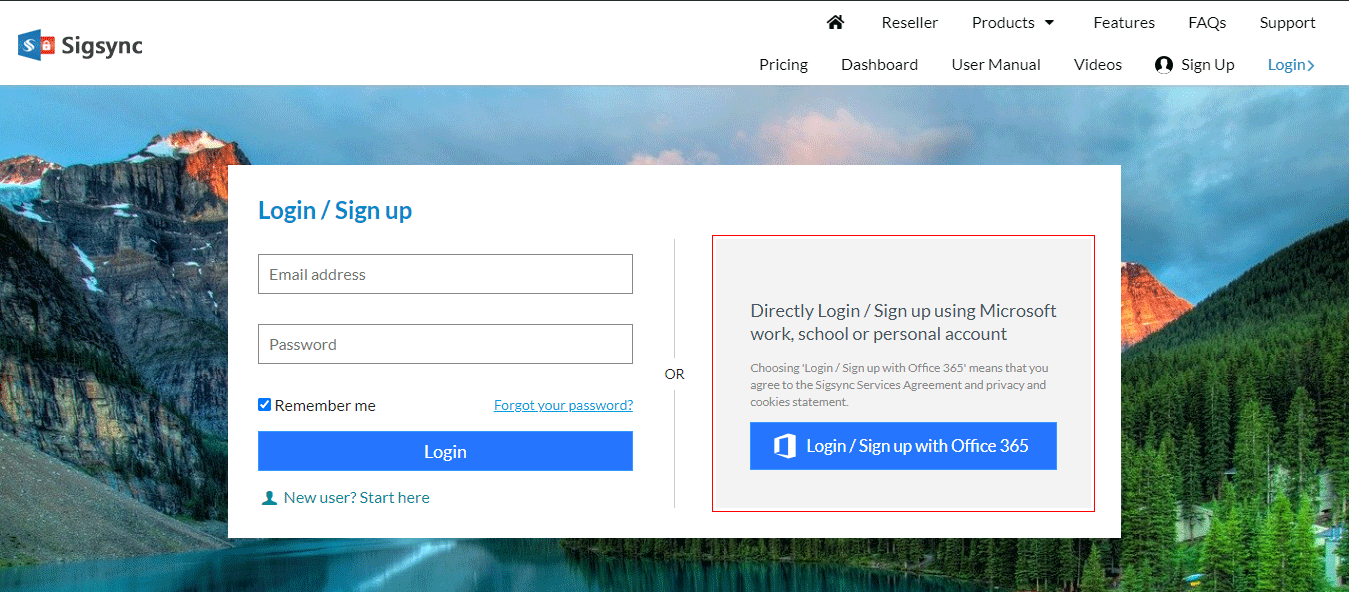
Step 2: If you are using an Office 365 account click ‘Login/Sign up with Office 365’.
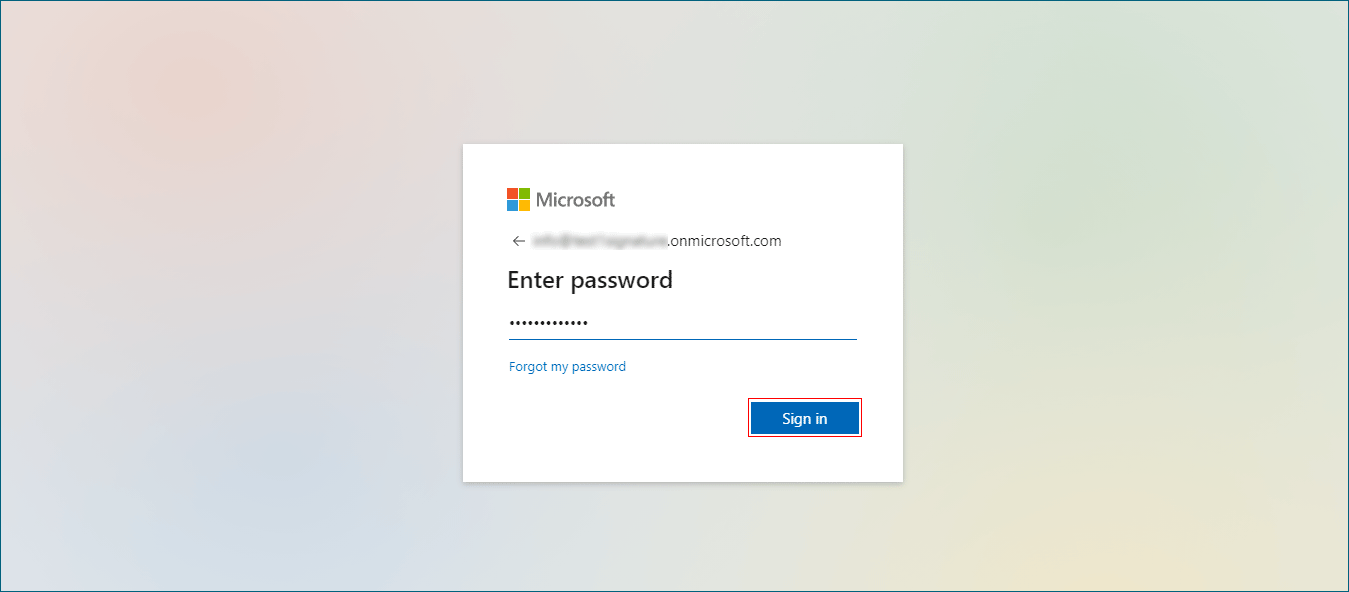
Step 3: Enter your Login credentials like ‘Username and Password’.
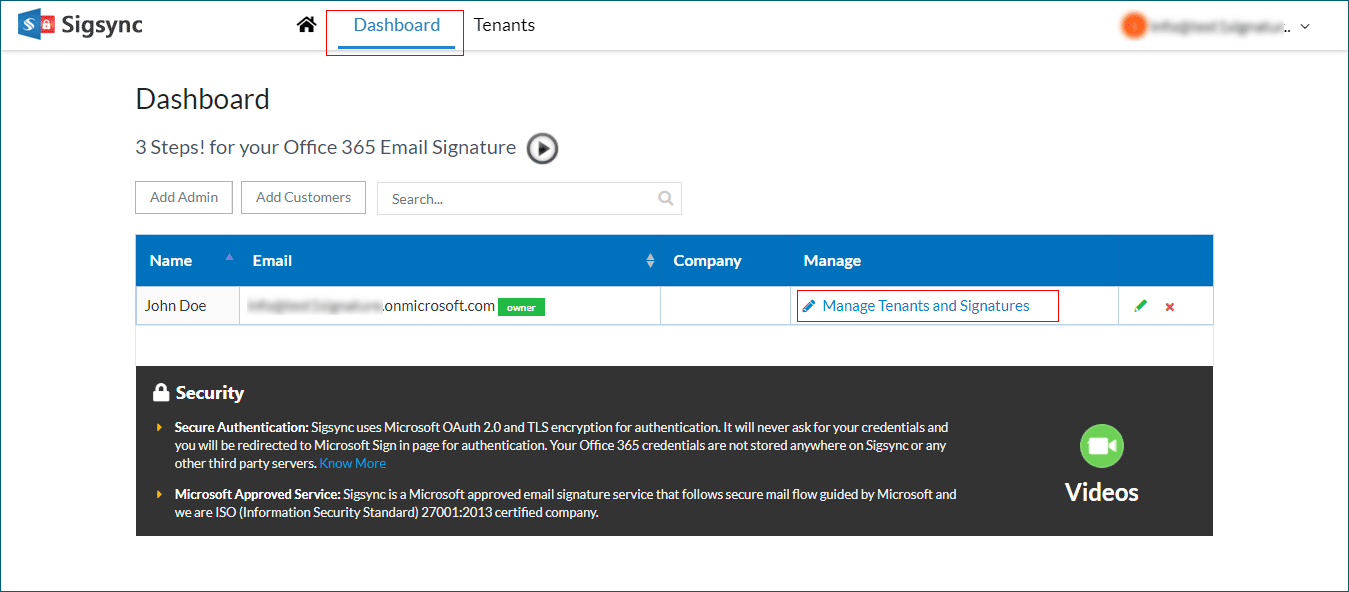
Step 4: Under the ‘Dashboard’ tab click ‘Manage Tenants and Signatures’. Keep in mind that this option shows up after you have added at least one tenant for your account.
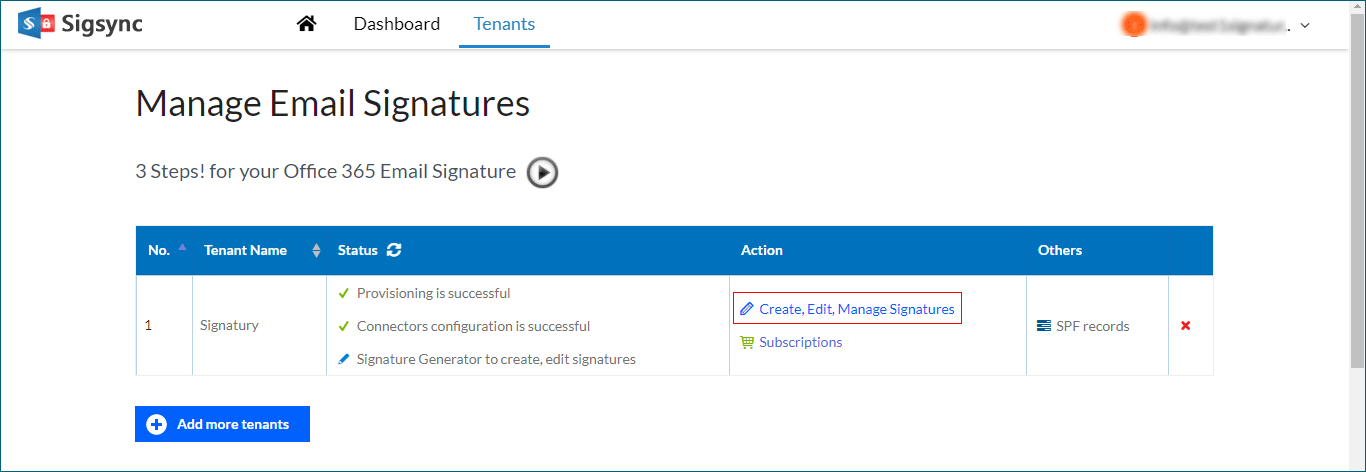
Step 5: In the next page click ‘Create, Edit, Manage Signatures’.
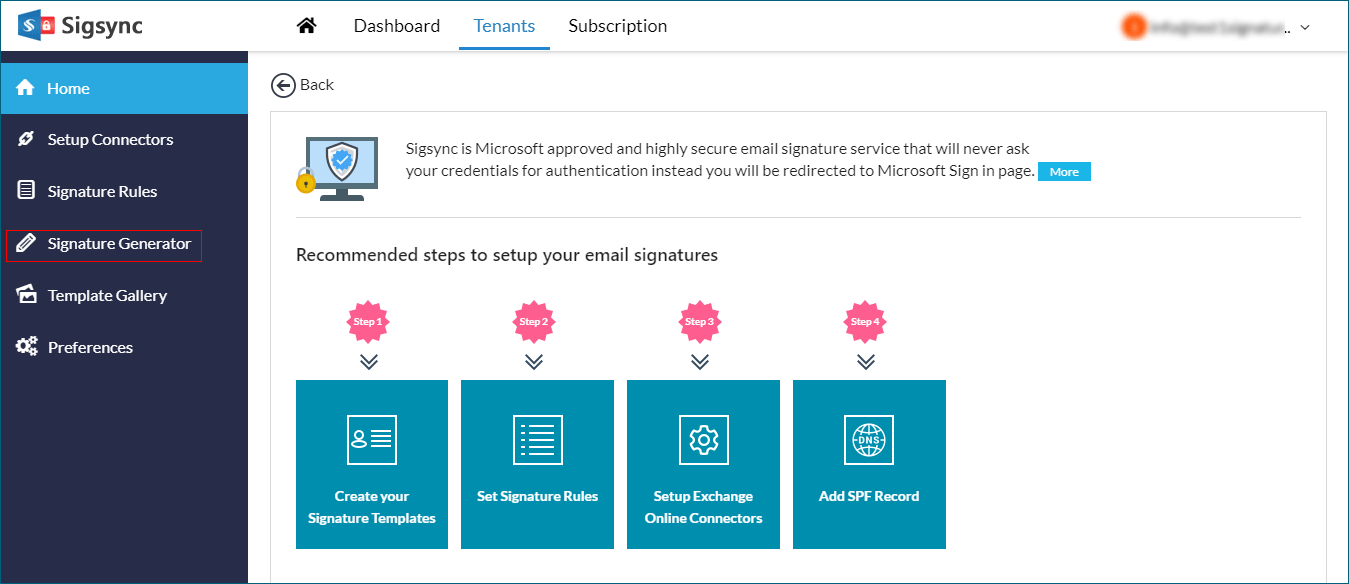
Step 6: Under ‘Tenants’ click the ‘Signature Generator’ tab in the left hand column.
Step 7: In Sigsync signature generator, click the ‘Choose Signature Templates‘ button to select a new signature template from the pre-existing template gallery.
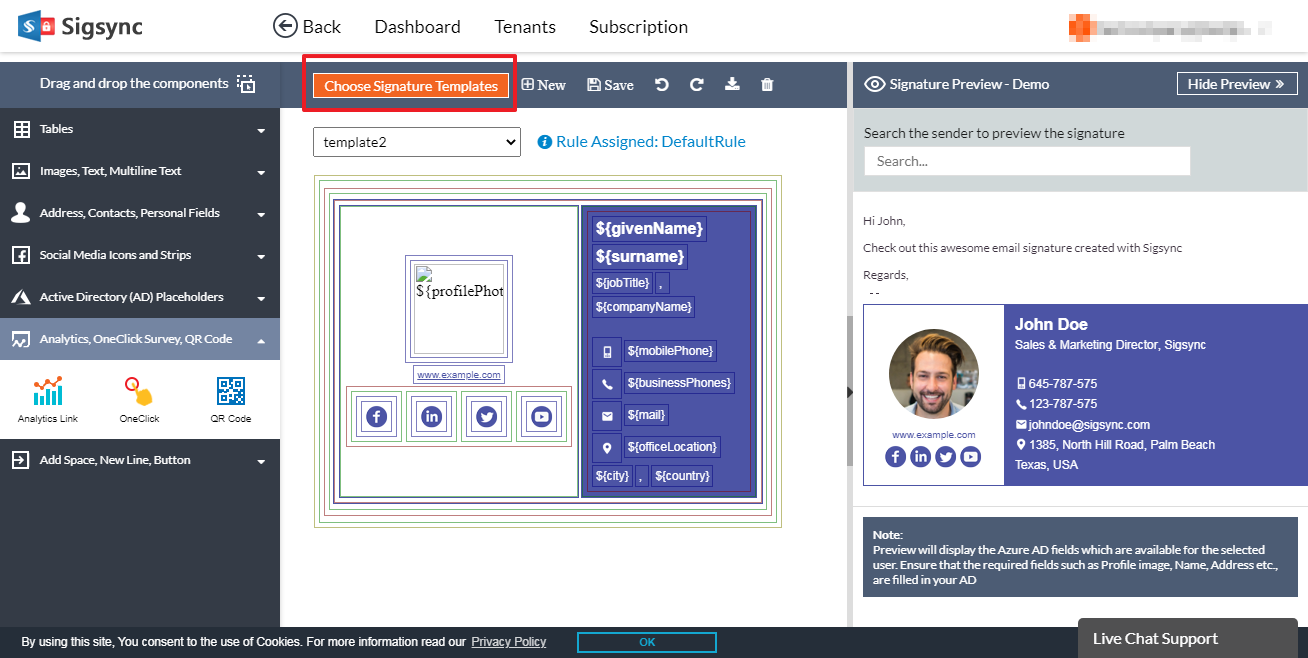
Step 8: Drag and drop the ‘Analytic Link‘ block into your signature.

Before we proceed further, we need to know what is meant by URL tagging. The process of appending unique identifiers to your URL’s is called as URL tagging. Adding the URL tags helps to track the sources of traffic to your website using Google Analytics or any other third-party services. The screenshot in the next step illustrates URL tagging.
Step 9: The ‘Analytic block’ displays a set of various parameters to fill in as shown. Let us understand what the different parameters mean in Sigsync’s email signature service.
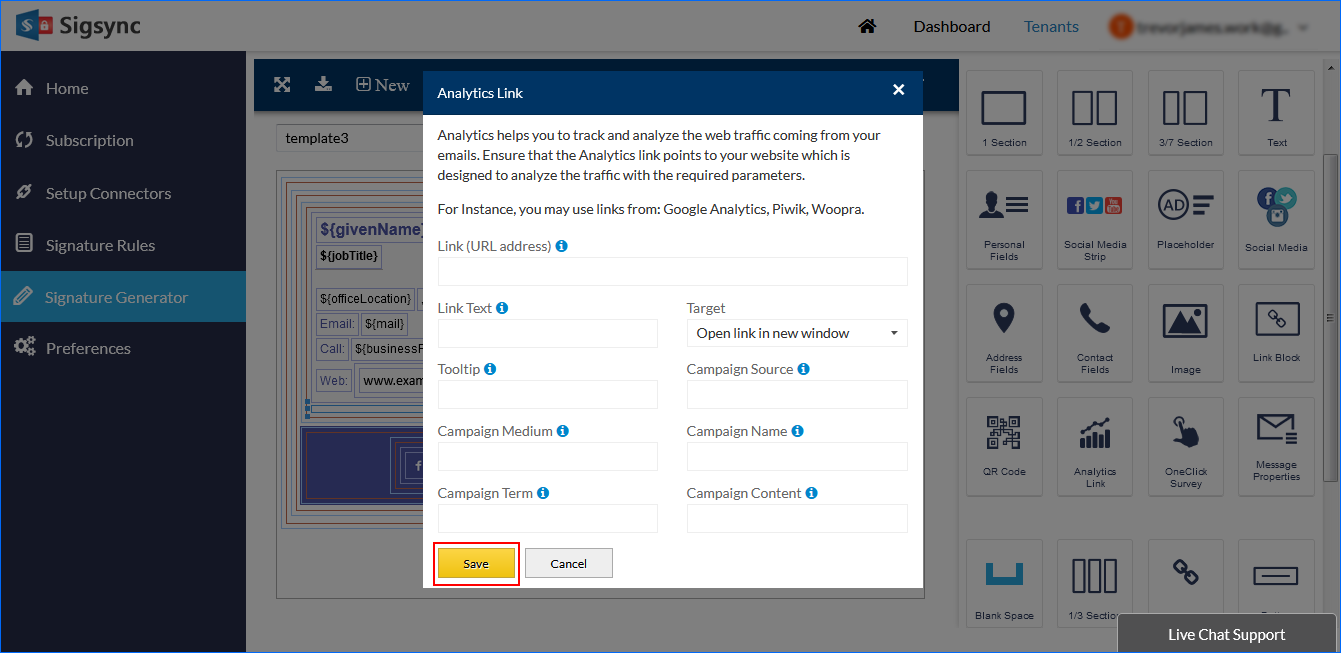
- Link (URL address): It’s your website link which needs to be added to track the traffic coming from the emails.
- Link text: It’s a link text which is clickable.
- Tooltip: The entered text will be displayed as a tooltip text when the mouse moves over it.
- Campaign source: It’s a source of the traffic to your website such as Google, newsletter etc.
- Campaign medium: It’s a medium of the campaign which contains the general source of traffic. Example: banners
- Campaign Term: It’s a keyword which is used to differentiate between the various ads.
- Campaign Content: It can contain the product name, product code or a slogan such as summer_sale.
Step 10: After adding the various parameters, Click the ‘Save’ button to apply the changes. You can view the results of your campaigns in the respective third-party service account as described below.
There are 3 different ways to verify your email signature campaign’s performance.
- Analytics with Matomo: Integration of Sigsync Email Signature service with Matomo to verify the performance of your email signature campaign.
- Analytics with Woopra: Integrate Sigsync Email Signature service with Woopra and evaluate the performance of your email signature campaign.
- Analytics with Google Analytics: Integrate Sigsync Email Signature service with Google analytics and track the performance of your email signature campaign.
How to effectively utilize these analytics?
Ok, now that we have guided you how to create analytics for your Office 365 email signature, lets look at some of the general points to analyse these analytics and what to do with them.
- Review the numbers consistently. Prioritize your tasks and allocate time to review the results you have obtained every fortnight or at the end of a month. It makes sense perform a longer review every 6 months for better results.
- Reflect on the activities and interaction of the recipient. When a recipient clicks and opens a mail, there are lots of activities which he can perform. For example,
- What content is popular among the recipients?
- What content in the email has the most response and clicks?
- Are there any new subscribers to your blogs, newsletters or product?
- Do you notice any large unsubscriber count for your product or newsletters?
- What response do you get for your email with and without including banners?

- Create and manage your customer portfolios. Customer profiles help you automatically segment the portion of population based on their interests. It is advisable to make a list of all the email addresses of your customers along with some basic information in separate folders so that a tailor-made email can be customized. You can also make groups. For example, people using your product for home needs, business purposes, for a social cause etc. Following are three categories of persons to whom your attention should be channelized.
- Loyal and existing customers. Your product has created an attachment with these customers. They are people who open and read your emails regularly and wait for any offers or discounts.
- New customers. These are the wider set of people who have recently become a part of your product family and are looking forward to establish a long lasting relationship.
- Potential customers. These customers have not yet joined your subscriber list or have not made any contact with your product. These are the people you desire to get on board.

- Leads and banners make it even more interactive. Leads and banners in your email signature direct your customers to to blog posts, websites or the latest discount offers on your product. Referrals in the signature asking for likes, shares and subscriptions on social media posts or with friends can make your product reach a wider audience. You can track which banners are hitting the bull’s eye and which banners are not appealing to your audience.
- Establish a relationship through newsletters. With the numbers and analysis in hand, it is prudent to establish an even more personal relationship with the customers. Let’s say your new banner is making waves with customers who have made contact with your product for the very first time. You can cleverly incorporate newsletter links along with the banner in your email signatures to bring them on board. If newsletters are not your cup of tea, you can offer more information about your product by linking your email signature to your blogs.

- Slow and steady wins the race. With all the hard work comes persistence. After a few months its time to review your emails again by specifically looking at the best and worst performing content. If there is an email with catchy phrases that is riding high and is a popular with your clients, then it makes sense to optimize future contents in your email accordingly. Adding feedback forms in your existing customers and asking them what they like and dislike helps you know customer mentality in general. Email analytics can also help determine the time of the day when an email was exactly opened. Are you sending all your emails in the early morning hours? Time to think again and prioritize them. It also gives information about how much time a user spends in reading your article, on which device he reads, so that the email elements can be updated in real-time.

- Craft a well designed email in the first place. Analytics and numbers become a myth, if the email is does not catch the eye of recipient in the first place. Make use of some psychological tricks so that your email gets noticed at first sight. There is already an article in our blog which details that.
Free Email Signature generator
Free online HTML Email Signature Generator that helps to create professional and visually compelling email signatures by adding your logo, brand colors, contact details and etc.,Conclusion
Email analytics are one of the impressive tools that gives information about what content is striking the audience and what is just going down the drain. Analysis and a deeper insight helps us in fine tuning to suit the needs of the customer. Poor marketing is one of the main reasons for the failure of a well developed product.